Introduction
Creating a menu in WordPress with pages like Service, Blogs, and Contact Us is an essential step to ensure your website has clear and accessible navigation. Menus provide a structured way for visitors to explore your content, helping them find key pages easily. To set up a menu, navigate to the Appearance section in the WordPress dashboard and select Menus. From there, you can create a new menu and add your pages, like Service, Blogs, and Contact Us, ensuring that each page is easily accessible from your site’s main navigation bar. This not only enhances user experience but also improves site organization.
Whether you’re working with a WordPress development company or handling the setup independently, creating a well-organized menu is a key element of custom WordPress development. If you’re using WordPress website development services, professionals can customize your menu to match your brand and layout. A white label WordPress agency can also assist with more advanced menu configurations, helping you create a seamless and intuitive browsing experience for your visitors.
Expert WordPress Development Solutions
Elevate your website with our expertise.

Here are the steps to create a menu and include pages like “Service,” “Blogs,” and “Contact Us”:
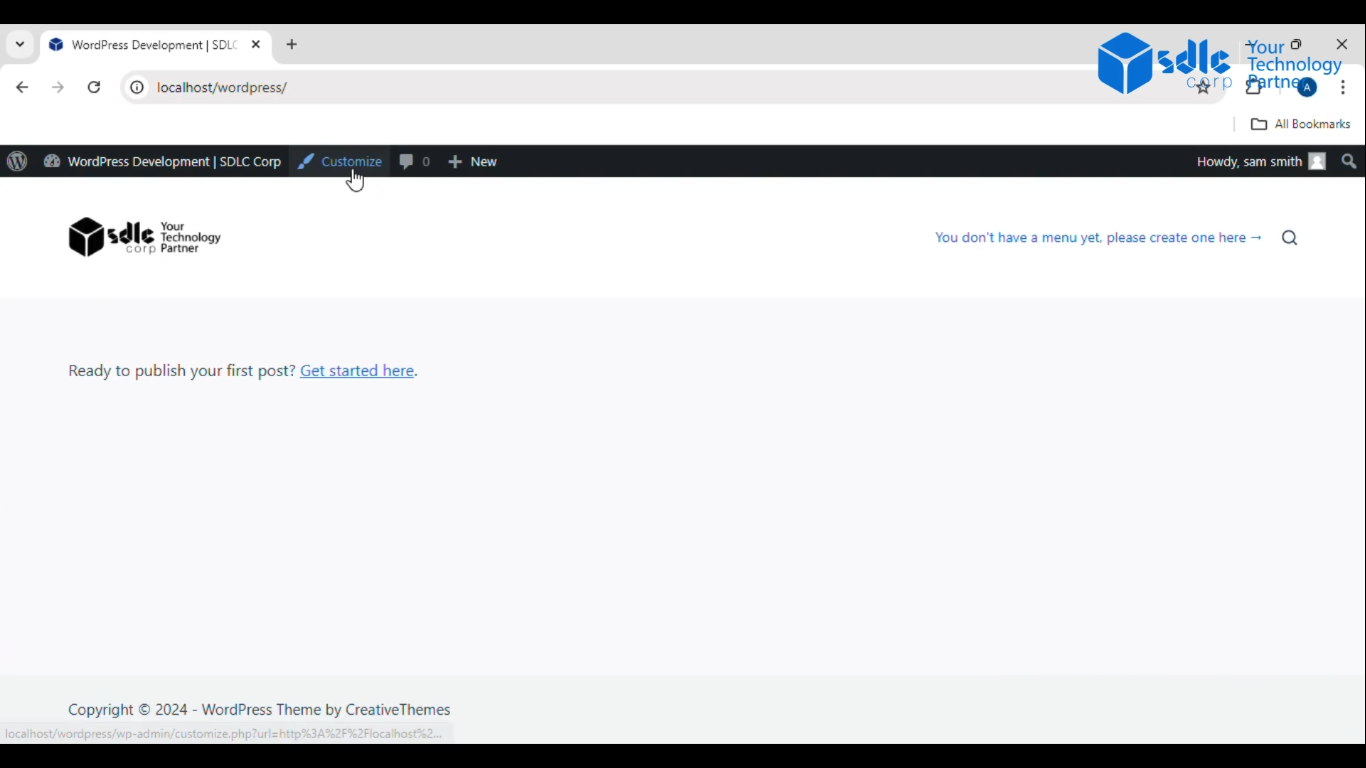
1. Click on the Customize Button
Navigate to your website’s admin panel or dashboard and find the “Customize” option. This is usually under “Appearance” or similar options in CMS platforms like WordPress.
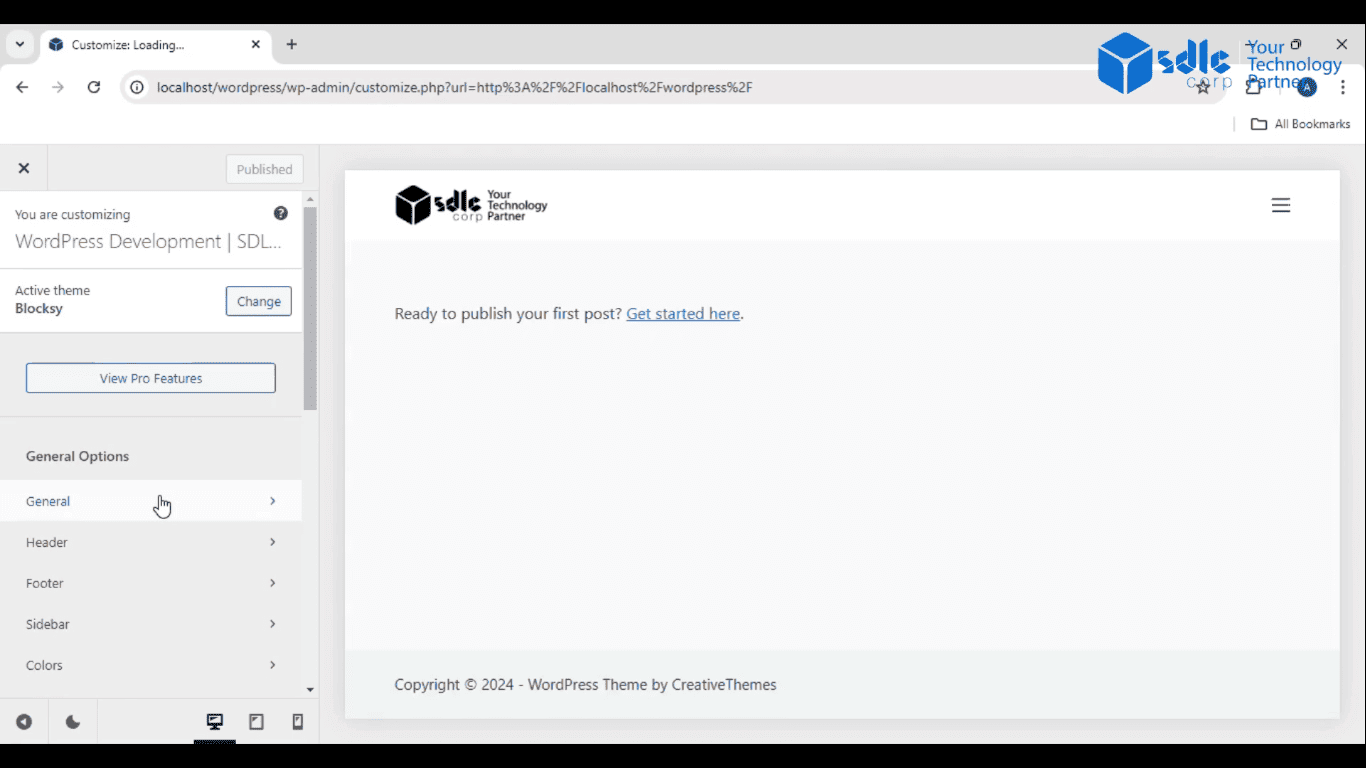
2. Click on the General
After clicking “Customize,” look for a section labeled “General” or something similar, where you can manage general website settings.
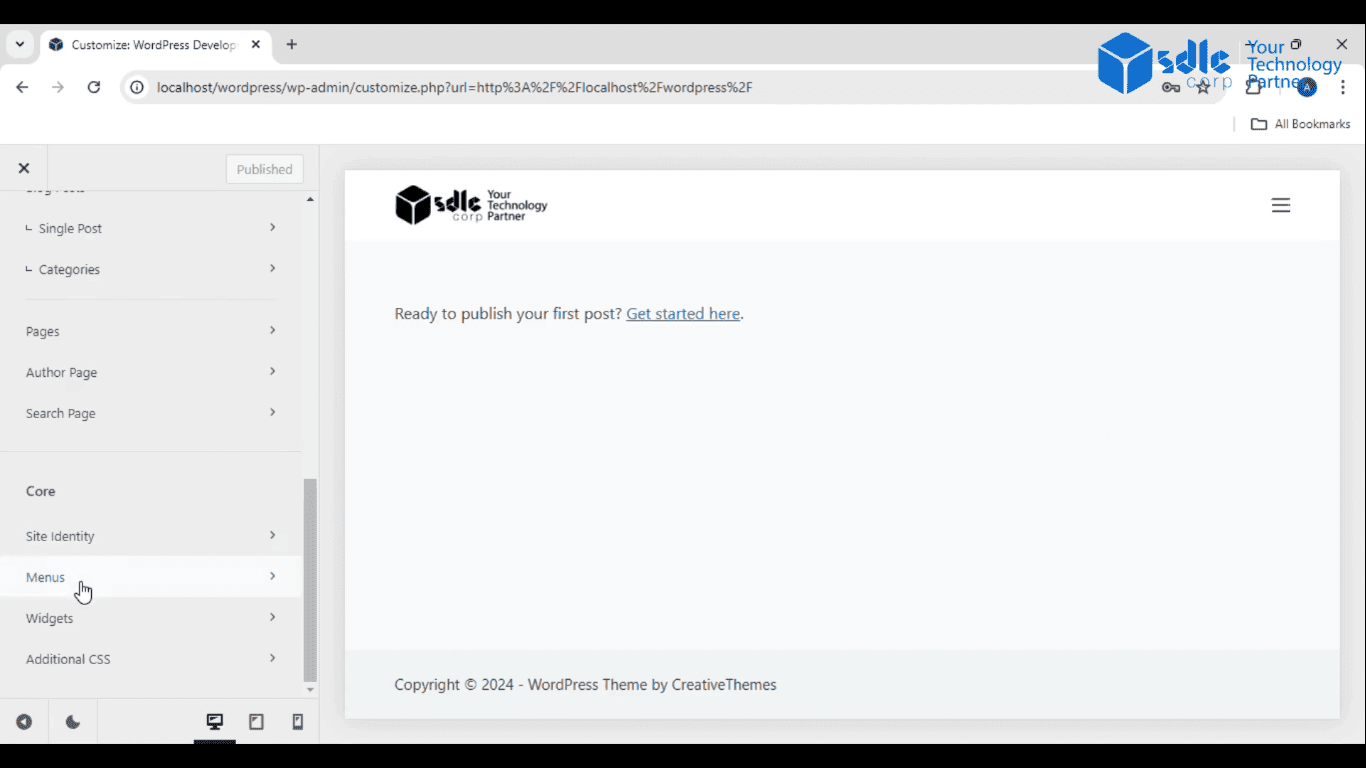
3. Click on Menus
– Within the “General” settings, find and select “Menus.” This will allow you to manage existing menus or create new ones.
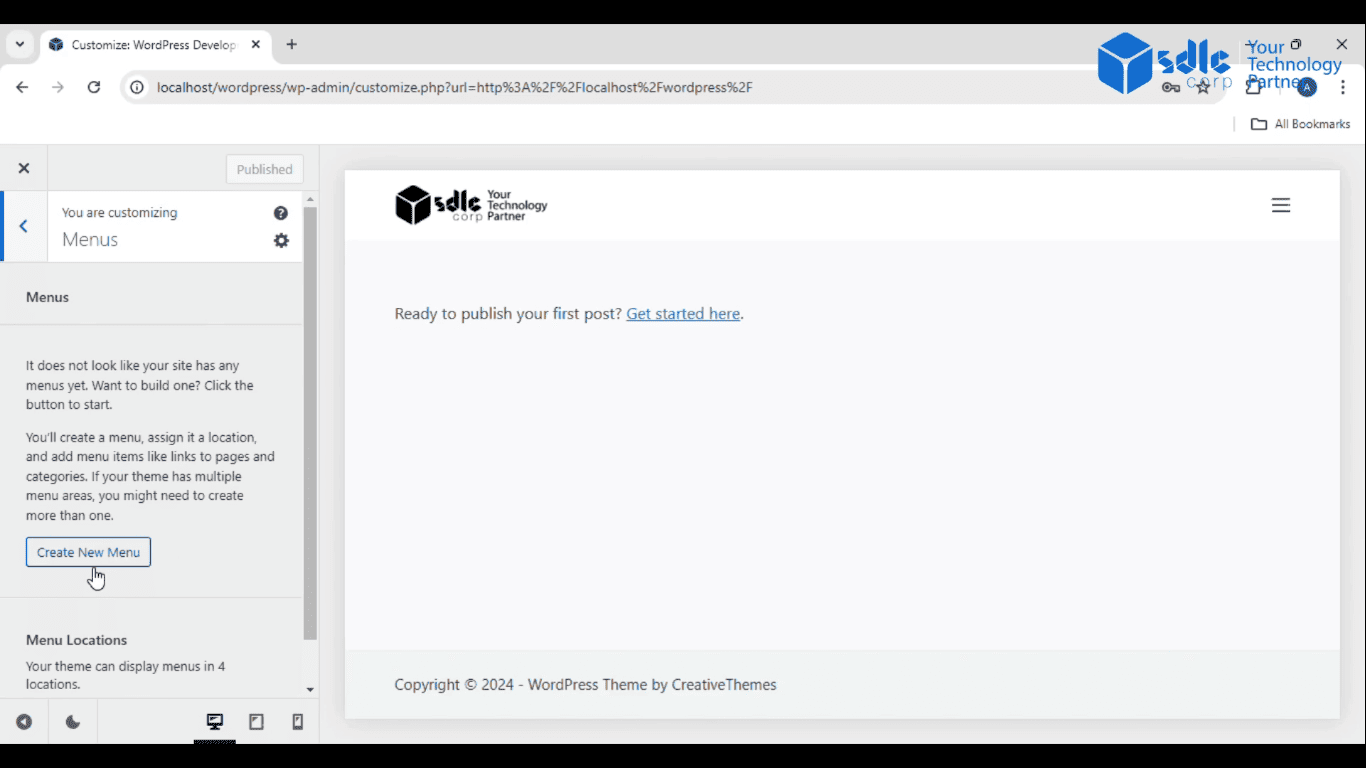
4. Click on Create New Menu
– In the “Menus” section, click on the button that says “Create New Menu.” You’ll be prompted to name your new menu and decide where you want it displayed (like the header, footer, or sidebar).
Custom WordPress Development Services
Tailored solutions for your business needs.

5. Click on Add New Page
– Once you’ve created the new menu, you can now add the pages you want to display. Click on “Add New Page” to include pages like “Service,” “Blogs,” and “Contact Us.”
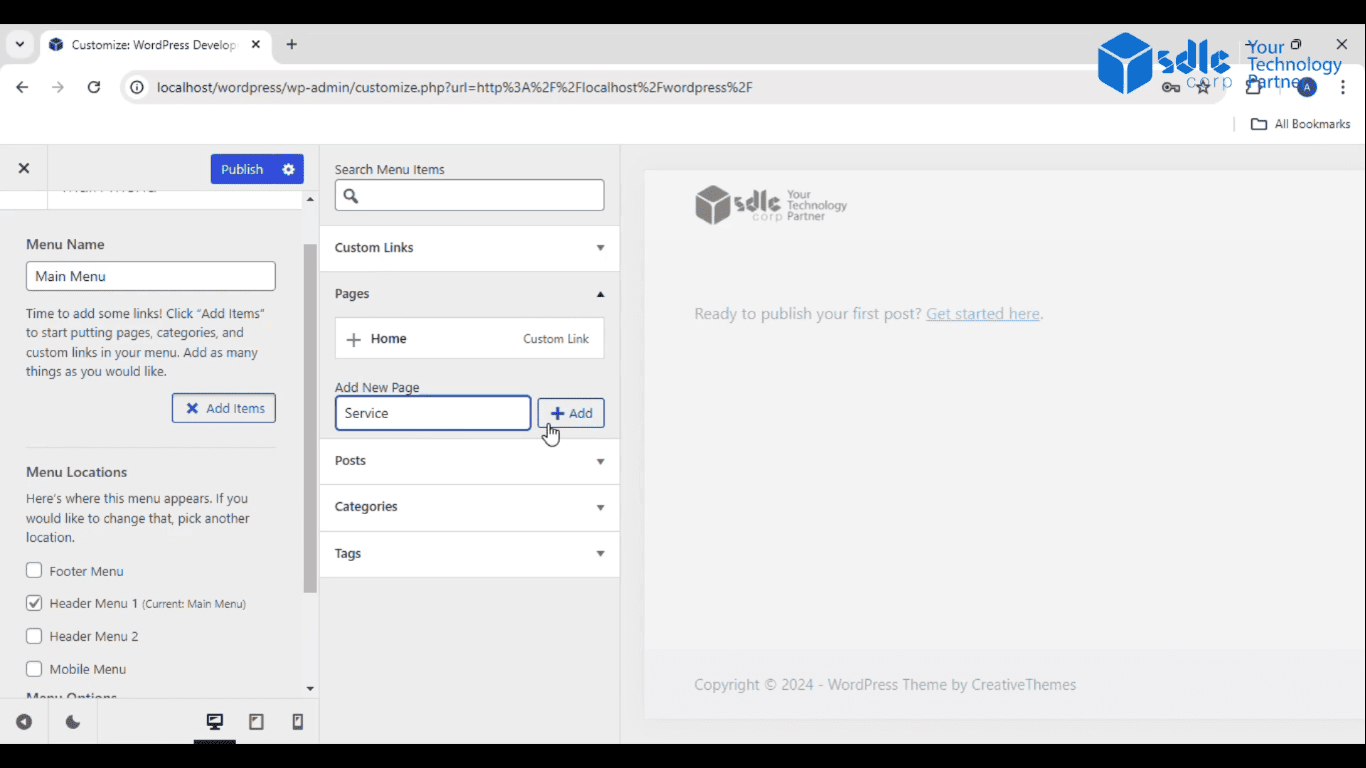
6. Click on Add Buttons
– After adding the pages, you can customize the appearance by adding buttons for each menu item. This is especially useful if you want a more visually appealing menu.
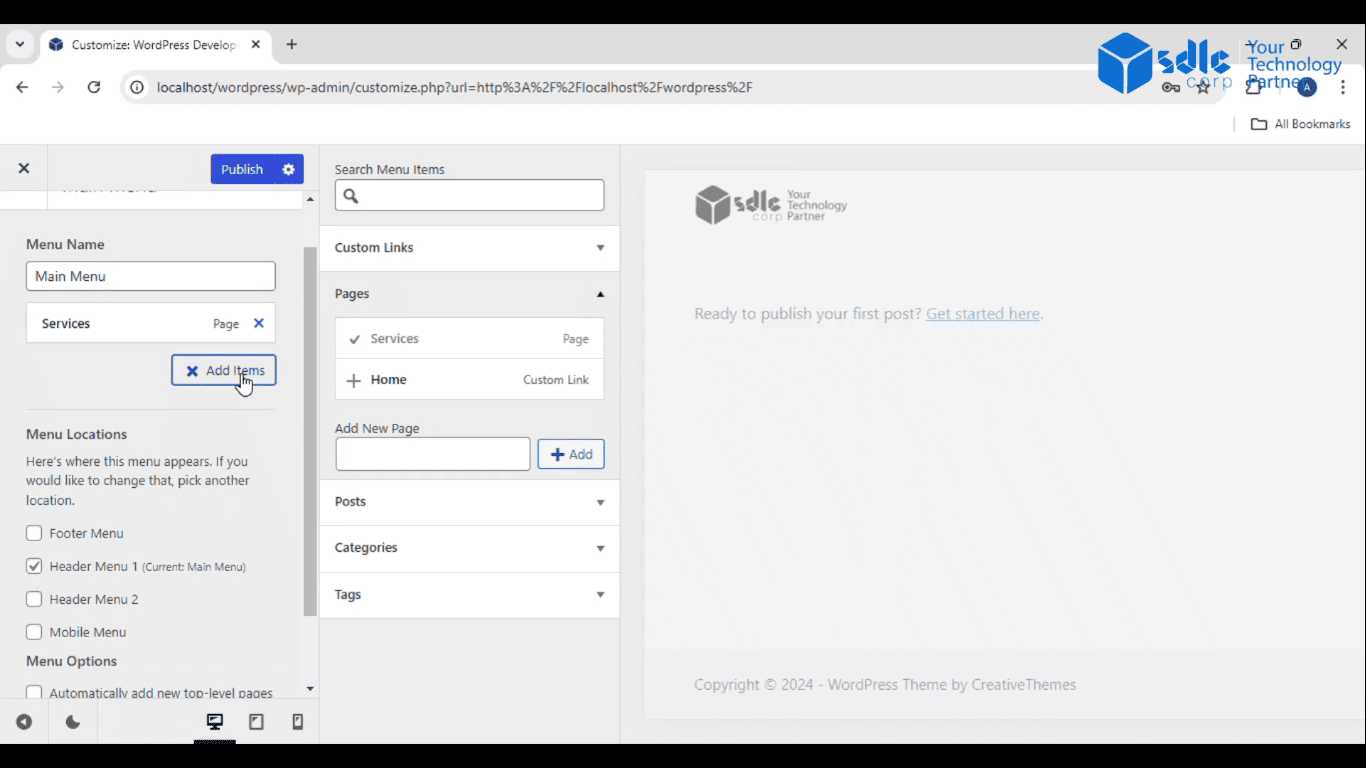
7. Click on Publish
– Once everything is set up, click the “Publish” button to save and apply your changes. Your new menu, along with the pages you’ve added, will now appear on your site.


Conclusion
Creating a menu for your website with pages like “Service,” “Blogs,” and “Contact Us” is a straightforward process that significantly improves site navigation for visitors. By following simple steps in the WordPress dashboard, you can add a new menu, assign relevant pages, and customize their order and appearance. Menus play a crucial role in enhancing user experience, making it easier for visitors to find important information. Whether you’re utilizing WordPress development services or working with a custom WordPress development company, setting up a clear and organized menu is essential for a user-friendly website.
A WordPress development company can assist in fine-tuning the menu to match your site’s design and functionality. If you prefer a more tailored approach, WordPress website development services or WordPress website design services can help ensure that your menu fits seamlessly within your site’s layout. Additionally, a white label WordPress agency can handle the process on your behalf, providing customized menu setups that enhance overall site performance. Menus are an essential component of WordPress web development services, contributing to a smooth and intuitive navigation experience.


