Introduction
Adding a countdown timer to your WordPress page is an effective way to create urgency and engage visitors. Whether you’re launching a product, running a sale, or promoting an event, a countdown timer can capture attention and encourage immediate action. In this guide, we’ll show you simple methods to integrate a countdown timer using plugins or custom code, making it easy to enhance your site’s functionality and user experience.
Expert WordPress Development Solutions
Elevate your website with our expertise.

Steps to Creating and Customizing WordPress Menus
1. Navigate to Appearance > Menus
Go to your WordPress dashboard, hover over the Appearance section, and click on the Menus option.
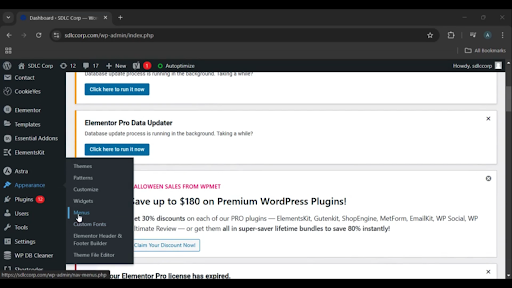
Get a closer look – Here’s the feature at work.
2. Click “Create a New Menu”
Select the Create a New Menu button to start designing a fresh menu.
Get a closer look – Here’s the feature at work.
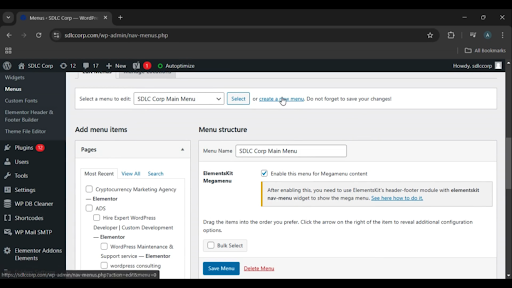
3. Select a Menu to Edit
If you want to modify an existing menu, click the Select a Menu to Edit button and choose the desired menu.

Get a closer look – Here’s the feature at work.
Custom WordPress Development Services
Tailored solutions for your business needs.

4. Name Your Menu
Enter a name for your new menu in the Menu Name field. This helps in identifying the menu, especially if you have multiple menus.
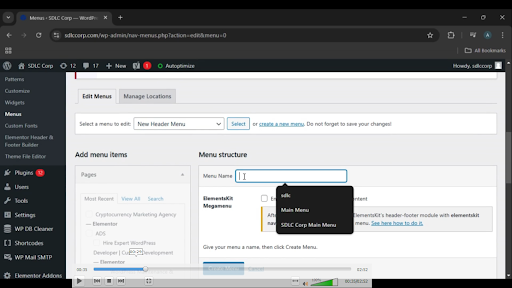
Get a closer look – Here’s the feature at work.
5. Click “Create Menu”
Once you have named your menu, click the Create Menu button to confirm.
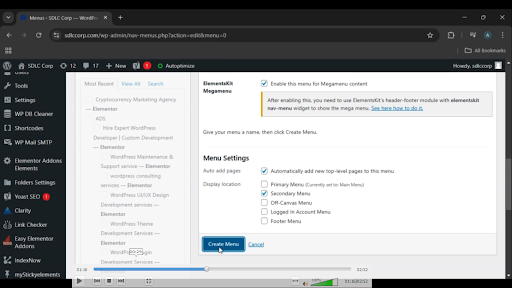
Get a closer look – Here’s the feature at work.
6. Save Your Menu
Once you are satisfied with your menu design, click the Save Menu button to apply the changes.
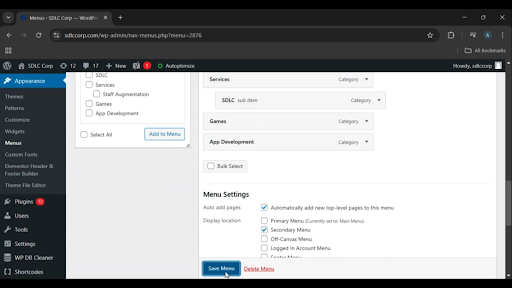
Get a closer look – Here’s the feature at work.

Conclusion
Creating and customizing menus in WordPress is an essential step in organizing your website’s navigation. By following these steps, you can design a menu that reflects your site’s structure and user needs. With options to add pages, links, and categories, WordPress menus provide flexibility and ease of use for creating a seamless browsing experience for your visitors.