Introduction
Adding buttons and headings to the Smart Slider in WordPress is a simple yet effective way to create a more interactive and visually engaging experience for your visitors. With the Smart Slider plugin, you can customize sliders to include calls to action and eye-catching headlines that guide your users through your content. Whether you’re highlighting a product or directing users to a specific page, using this feature can improve user engagement.
Button and heading added in smart slider
Smart Slider 3 allows you to enhance your sliders by adding buttons and headings, creating a more interactive and visually appealing experience. Whether you want to guide users to a specific page or make your content stand out, adding these elements is simple. Here’s a quick guide on how to do it.
Step 1: Edit Your Slider
First, navigate to Smart Slider in your WordPress dashboard. Select the slider you want to customize and click Edit to open the slider editor.
Get a closer look – Here’s the feature at work.
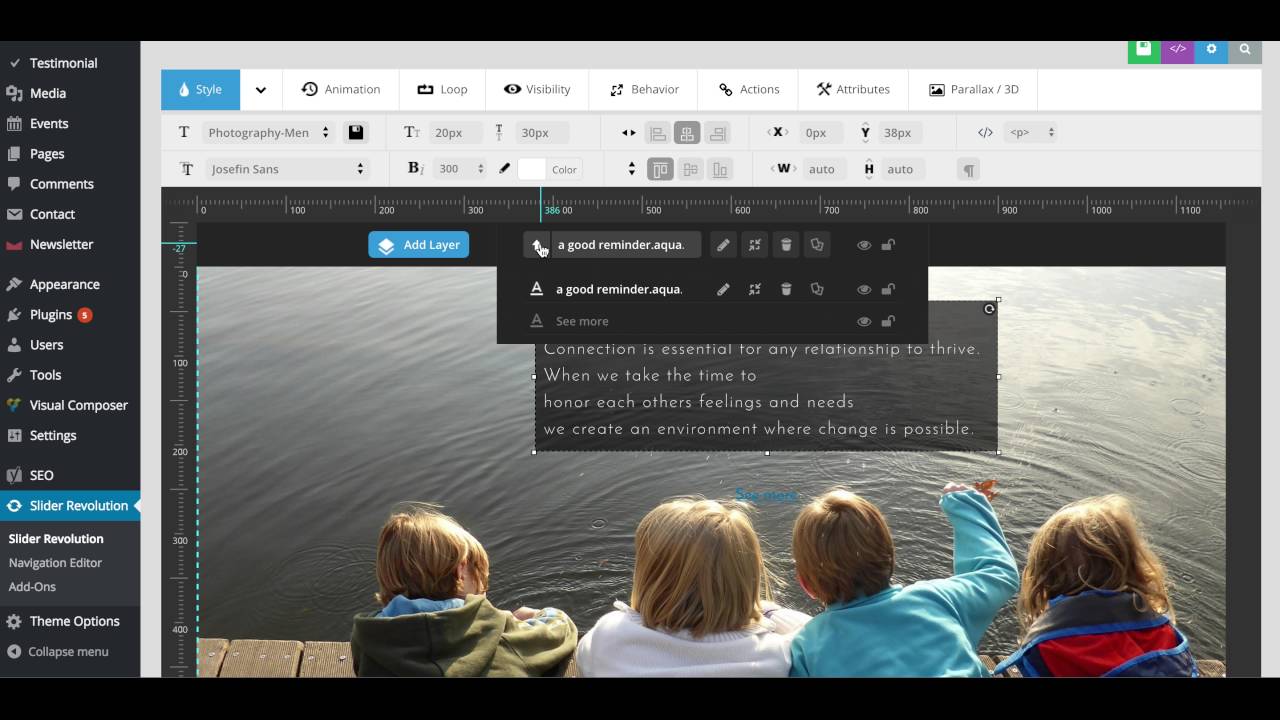
Step 2: Add a Heading
In the slider editor, click on Add Layer and select Heading from the options. This will allow you to add a heading or title to your slide. You can then customize the text, font, size, and position of the heading to fit your design.

Get a closer look – Here’s the feature at work.
Step 3: Add a Button
To add a button, click Add Layer again and choose Button. Customize the button text, style, and the URL link where you want the button to lead. You can also adjust the size, colors, and hover effects to match your slider theme.
Get a closer look – Here’s the feature at work.
Step 4: Position the Layers
Drag and position both the heading and button layers on your slide. You can place them anywhere within the slide area, ensuring they align with your design vision.
Get a closer look – Here’s the feature at work.
Step 5: Save & Preview
After customizing the heading and button, click Save. Then, use the Preview option to check how the heading and button appear on the live slider.
With these simple steps, you can easily add headings and buttons to your Smart Slider in WordPress, making your sliders more engaging and functional!
Get a closer look – Here’s the feature at work.