Introduction
Positioning a container effectively is essential when designing web pages or applications, ensuring elements are well-organized and visually appealing. Below is a step-by-step guide on how to position an image container, from adding it to finalizing the settings for publishing.
Steps to Position the Container
1. Click on the Add Container Button
Begin by selecting the Add Container option from the layout or editor interface to insert a new container onto your canvas.

Get a closer look – Here’s the feature at work.
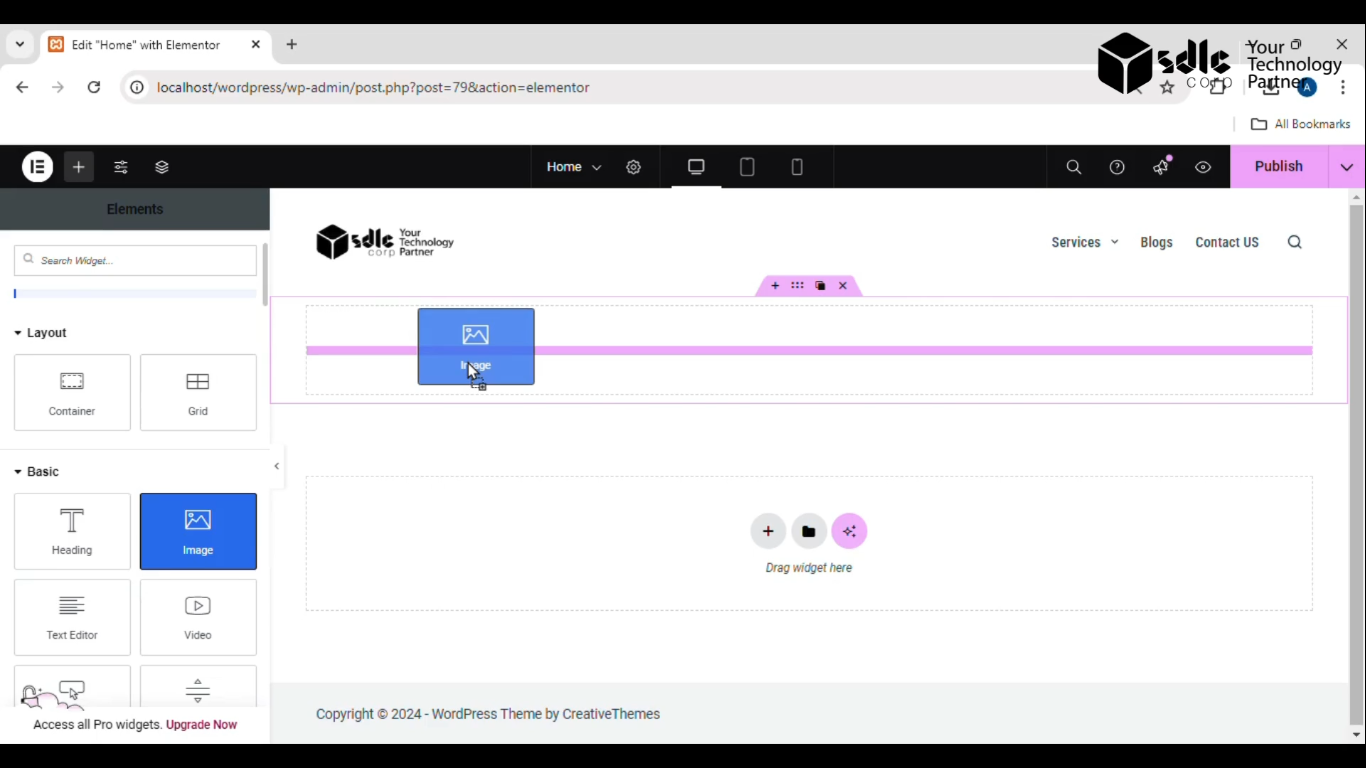
2. Drag and Drop the Image Container
Choose an image container from the available options and drag it to your desired position on the page.

Get a closer look – Here’s the feature at work.
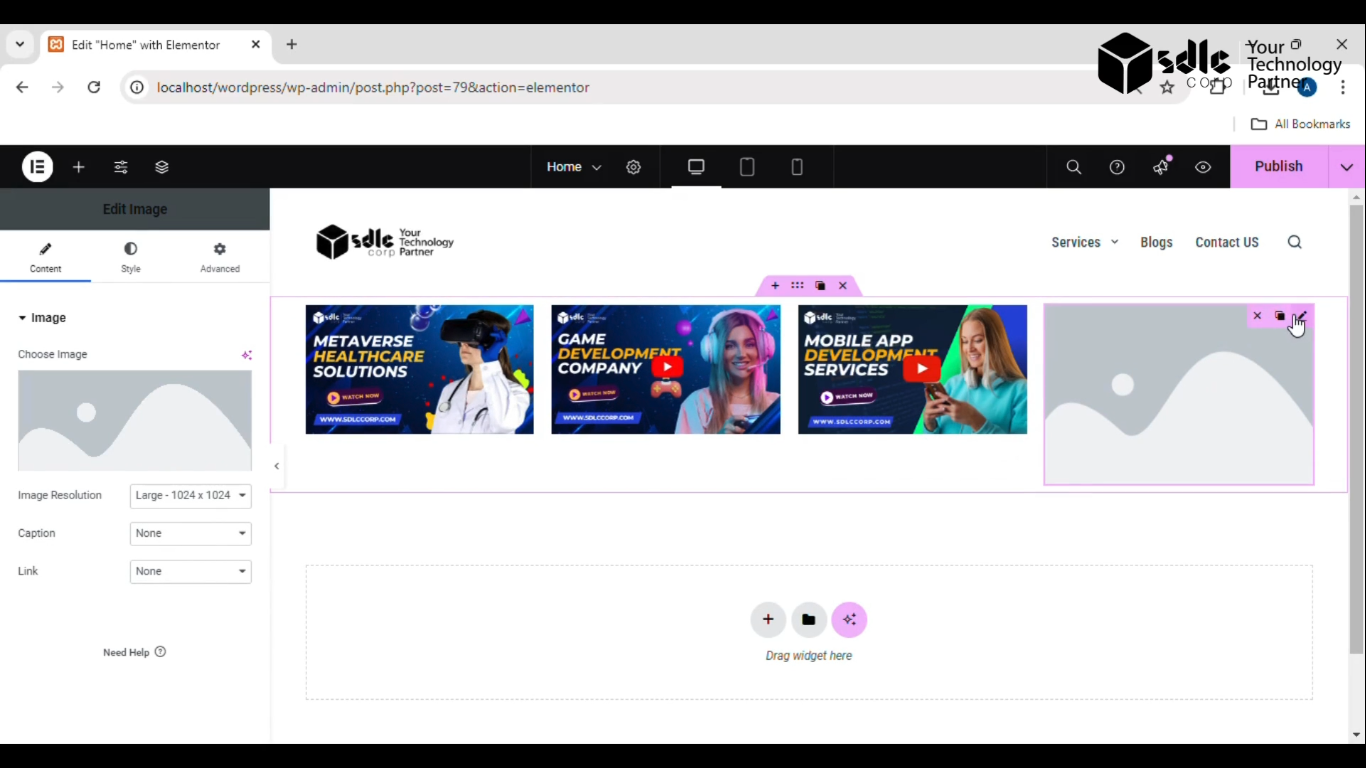
3. Click on the Edit Button of the Image Container
To customize the content, click the edit (pencil or settings) icon within the container.

Get a closer look – Here’s the feature at work.
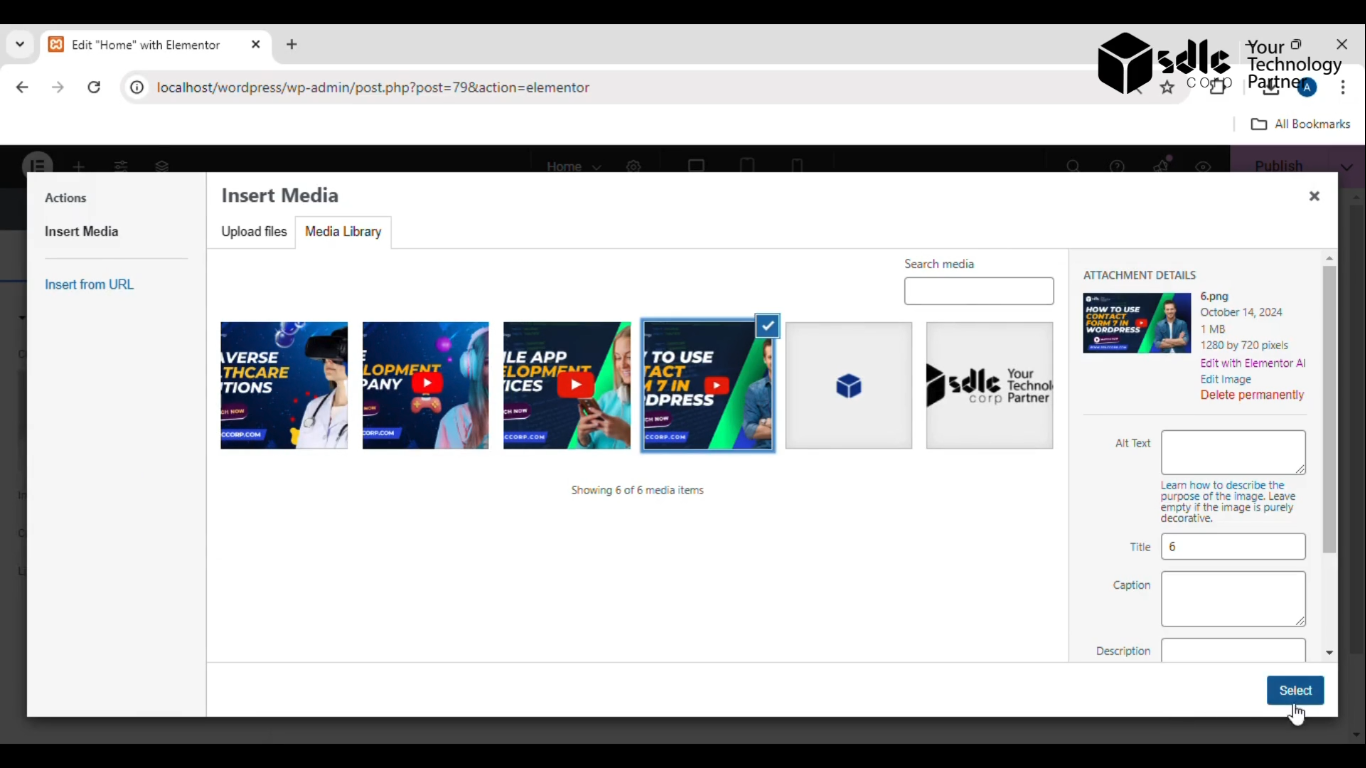
4. Select the Image
In the edit menu, choose an image either from your computer or a media library.

Get a closer look – Here’s the feature at work.
5. Do Settings for the Images
Adjust relevant settings such as size, alignment, margins, and padding to ensure the image fits well within the container.

Get a closer look – Here’s the feature at work.
6. Click on the Publish Button
Once satisfied with the adjustments, click the Publish button to make the changes live.

Get a closer look – Here’s the feature at work.
Conclusion
Positioning a container involves more than just adding elements—it requires thoughtful placement, customization, and alignment to enhance the user experience. By following these steps, you ensure that the container not only holds your image properly but also integrates seamlessly into your design layout.


