Introduction
Salesforce record types let one object support different processes without clutter. They control stages, picklists, and layouts so users see only what matters. Used well, they speed entry and reduce errors.
This guide explains Record Types in Salesforce and how to set up record types in Salesforce the right way. You’ll learn when to create a new type, when not to, and how to design layouts, Path, validation, and Flow for clean data and clear reporting.

1) What Are Record Types in Salesforce?
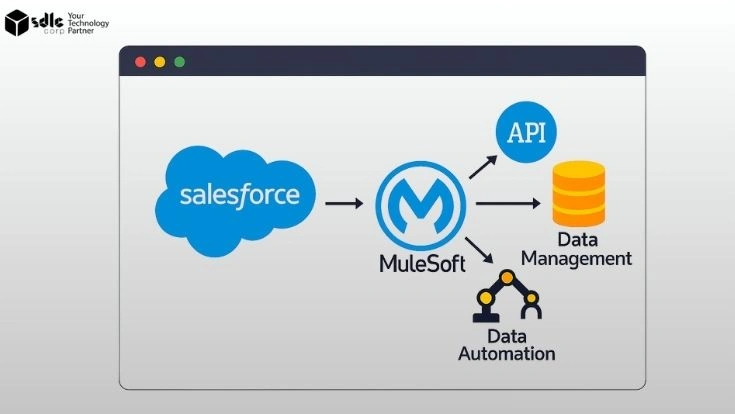
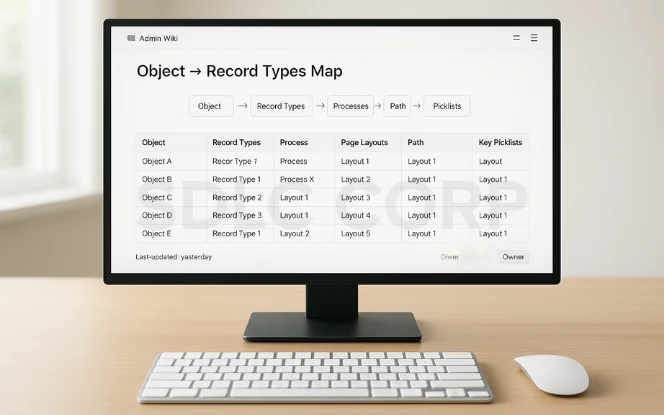
A record type is a way to run more than one business process in Salesforce on the same object. It lets you change stages or statuses, control picklist values by record type, and design different Salesforce page layouts by record type. Think of a record type as a mode for a record.
Sales and Service can share the same object while each team sees the fields and choices that match its process. You can also assign record types to profiles so the right users land on the right process by default. When combined with profiles vs permission sets, you get a good access strategy without turning record types into a security tool.
2) When to Use Salesforce Record Types (and When Not To)
3) Benefits and Common Pitfalls
Common pitfalls: Adding new record types for small differences creates clutter and extra training. Record types are not a security tool use profiles vs permission sets and sharing for access. Vague names and missing descriptions make maintenance harder over time. If picklists, layouts, Path, validation, and automation are not aligned, the user experience becomes confusing and errors increase.
4) How to Set Up Record Types in Salesforce (Step-by-Step)
Follow this sequence in a sandbox. Keep changes small and test as you go. This section is your practical how to set up record types in Salesforce guide.
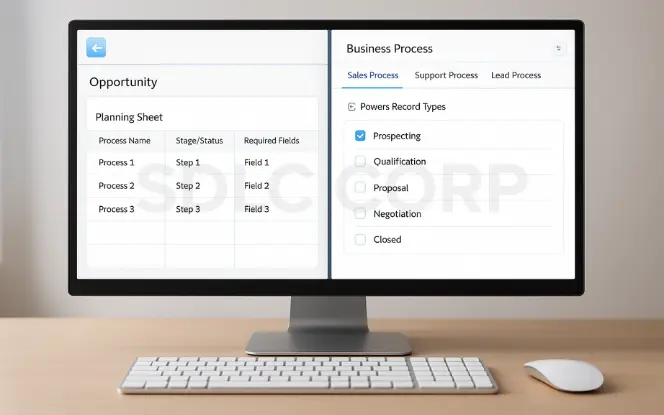
Step 1 — Plan processes List the distinct processes for one object. Confirm stage/status lists and required fields per process. Keep picklists short.
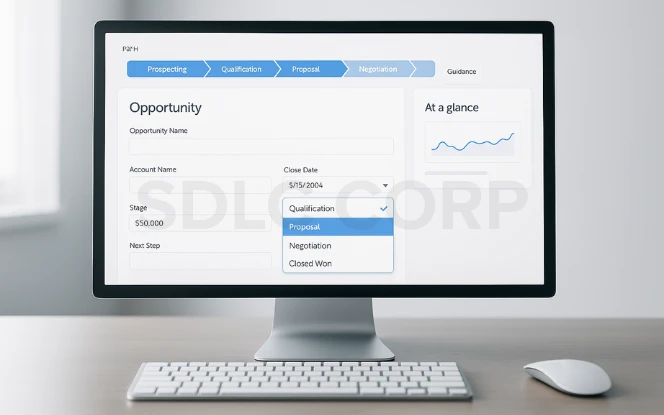
Step 2 — Define business processes On Opportunity, Case, and Lead, create or edit the Sales/Support/Lead Process. These power Record Types in Salesforce with the right stage/status values.
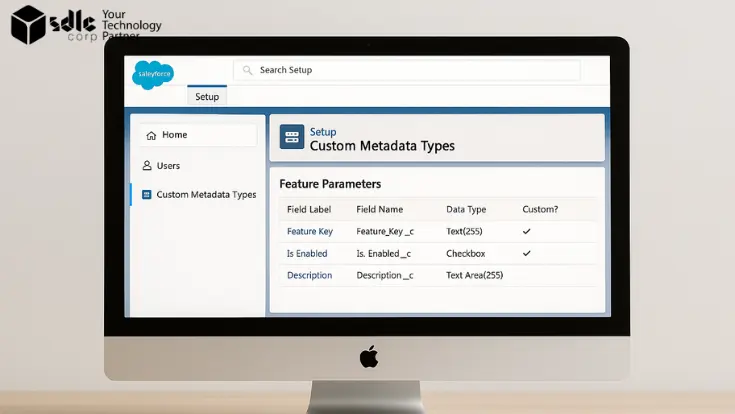
Step 3 — Create the record type<br>
Go to Setup → Object Manager → [Object] → Record Types → New.
Select the business process (when supported).
Add a clear label users understand.
Add an admin description.
Save and test before a wide release
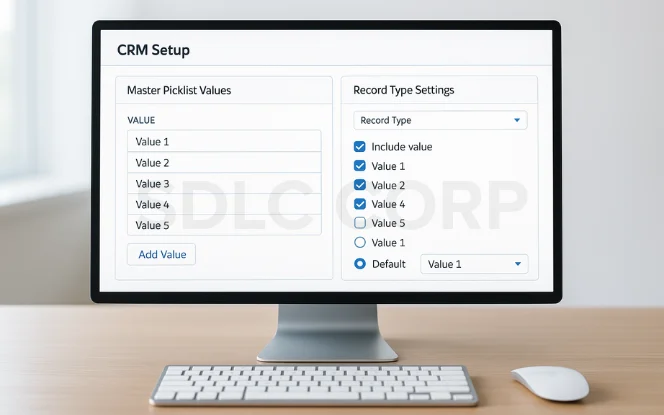
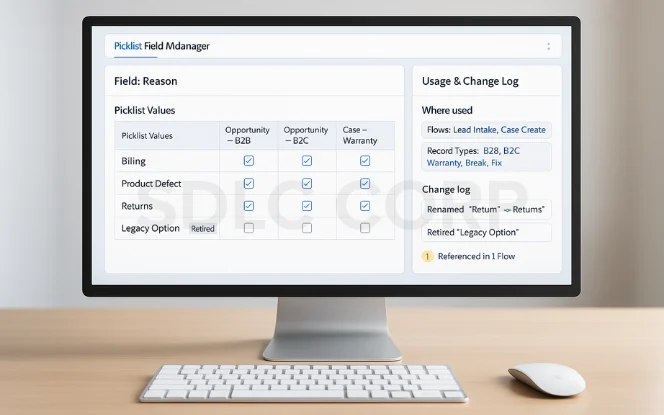
Add values to the master picklist first. For each record type, expose only needed values. Set a sensible default. This is the core of picklist values by record type.
Map each profile to the correct default type. Use profiles vs permission sets for exceptions and upgrades.
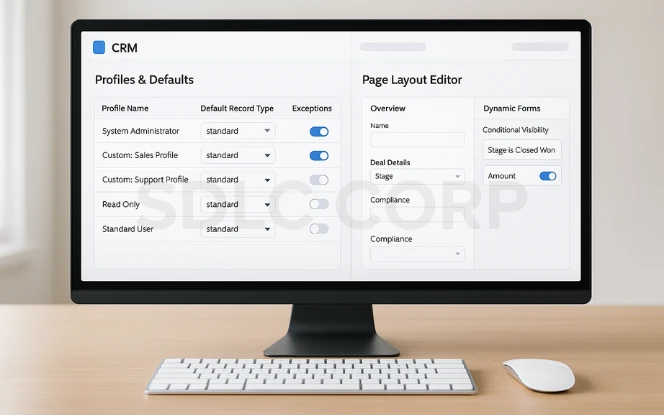
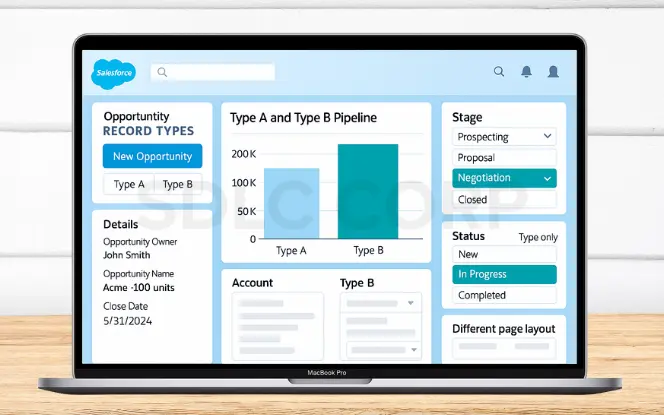
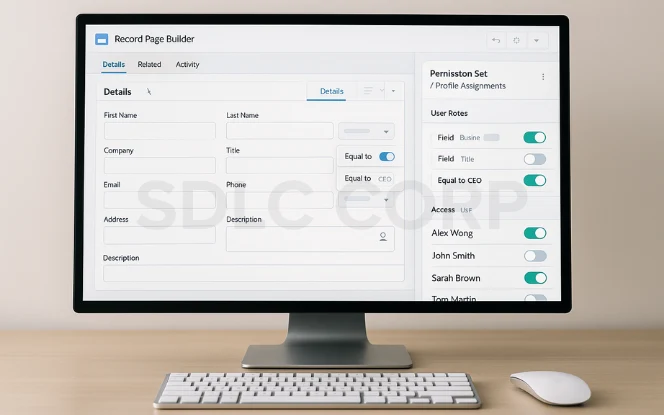
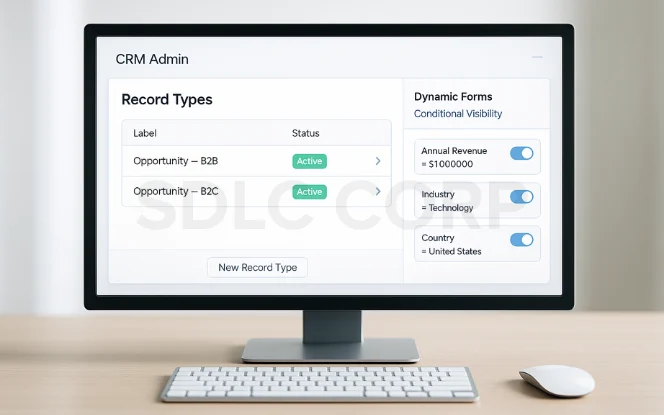
Build focused Salesforce page layouts by record type. Keep sections short. Group fields by step. Use Dynamic Forms to show or hide fields by context.
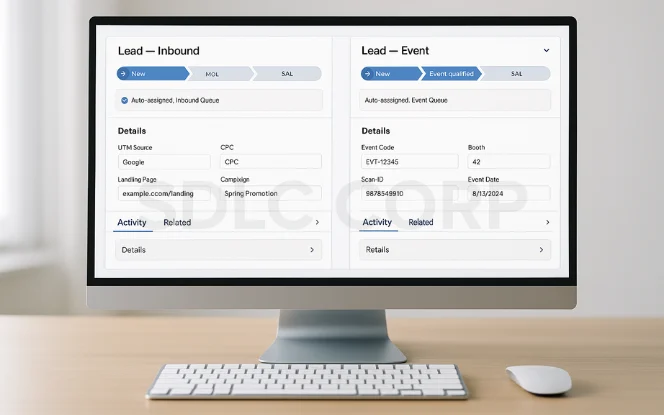
5) Real-World Use Cases
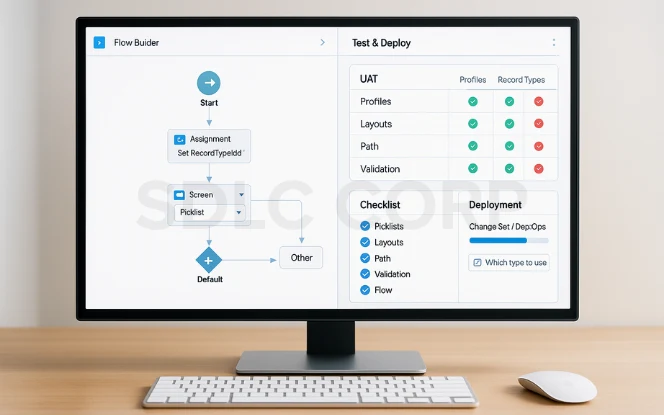
6) Automation Patterns with Flow
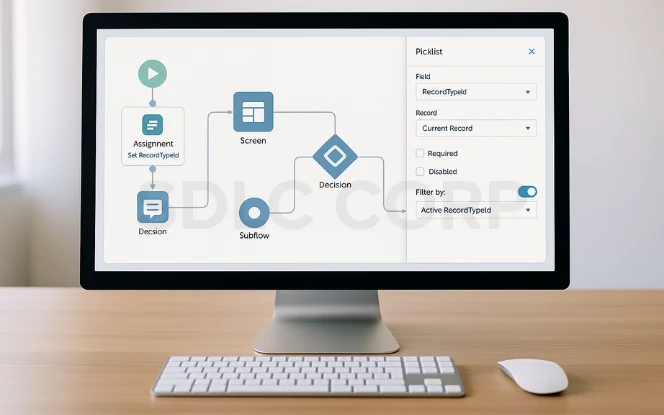
Set the record type early in Flows. Assign the RecordTypeId first so picklists show only valid values, and defaults or validations apply correctly. This keeps screens clean and reduces errors.
Filter picklists by record type to keep options relevant and prefill defaults for faster entry. Use Decision elements on $Record.RecordTypeId to branch into subflows, show type-specific screens, or trigger approvals—keeping each process focused without extra complexity.
7) Validation and Data Quality
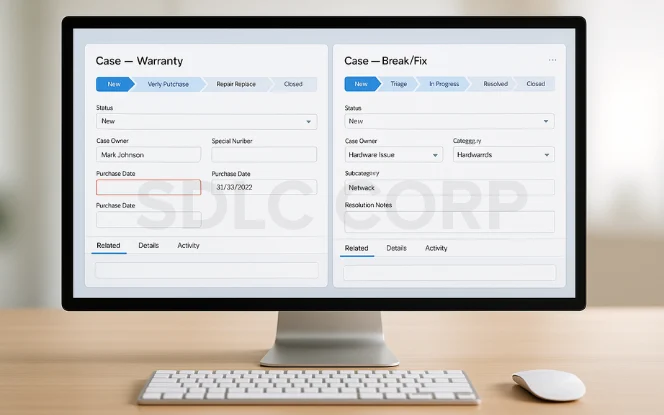
Scoped rules
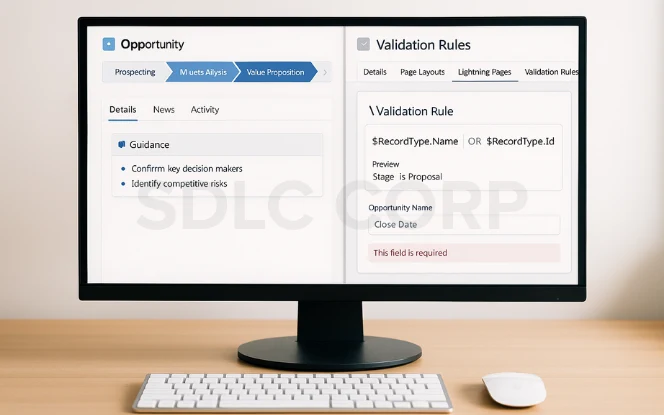
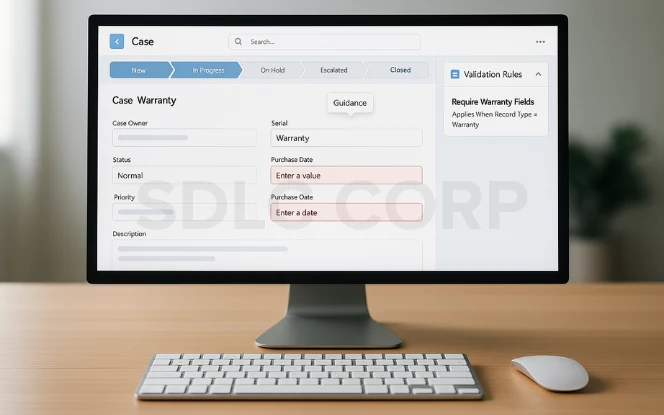
- Write Salesforce validation rules by record type.
- Example: If Warranty type, require Serial Number and Purchase Date.
- Keep messages short and helpful.
- Close the loop with Path
Use Lightning Path Salesforce to nudge users at each stage.
Keep guidance short. Put policy in validation and automation.
8) Governance and Maintenance
Naming
Use short, plain labels that users understand. Keep API names consistent across objects so admins can read configs at a glance. Add clear, admin-facing descriptions that explain who uses the record type and why it exists. This helps onboarding and reduces mistakes when you edit Salesforce record types later.
Keep counts low
Defaults Assign record types to profiles and set a safe default for each. The right default removes a decision at create time and cuts errors. Fewer choices mean fewer mistakes and a faster path to clean data.
Audit picklists
Documentation
9) Reporting by Record Type
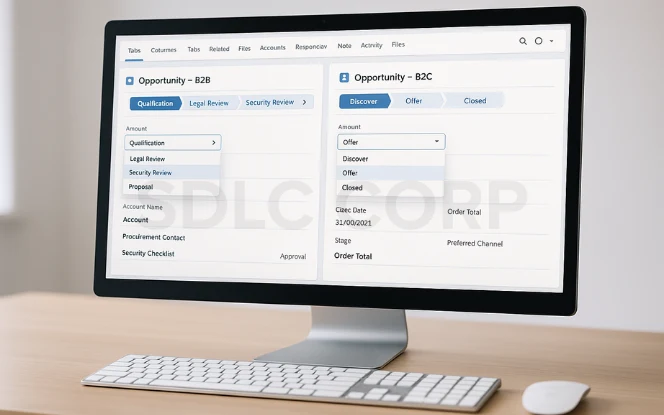
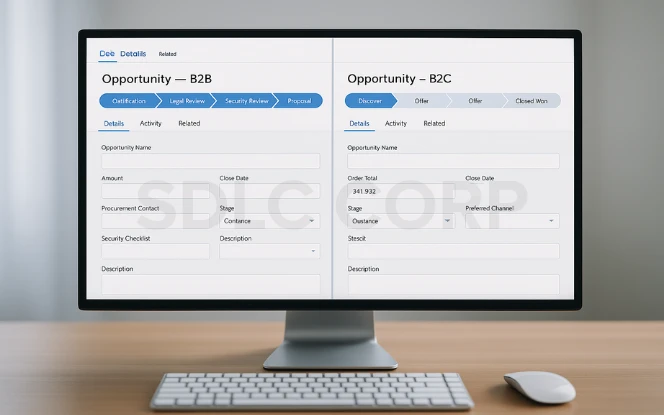
Dashboards: Segment charts by record type and stage so each process shows its story. Track throughput, cycle time, conversion rate, and aging to spot slowdowns. Place views side by side like B2B vs B2C opportunities so leaders compare pipeline health without digging into raw data.
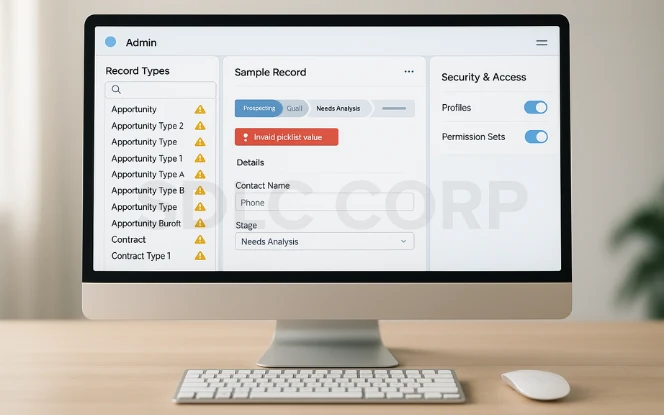
Data checks: Build reports to flag missing fields, invalid picklist values, or records stuck too long. Watch for “Other” or “Unknown” entries; they signal picklist drift or training gaps. Review these reports weekly to keep data clean and dashboards reliable.
Conclusion
Salesforce record types let you manage different processes on the same object without clutter. Use them only when stages, picklists, layouts, or approvals truly differ; for small tweaks or access, rely on profiles or permission sets. Keep layouts simple, set defaults, and add Path for quick guidance. In Flow, set RecordTypeId early so picklists filter correctly.
Keep the number of record types low, name them clearly, and document their use. Audit picklists often and retire unused types with a plan migrate data, update defaults, and adjust Flows. Report by record type to track process health, and always test in a sandbox before scaling.
FAQs
Q1. How many Salesforce record types should I create?
Q2. Are Record Types in Salesforce a security tool?
Q3. Do I need Lightning Path Salesforce for each type?
Path is optional but helpful. Create one per type where stages differ.