Introduction
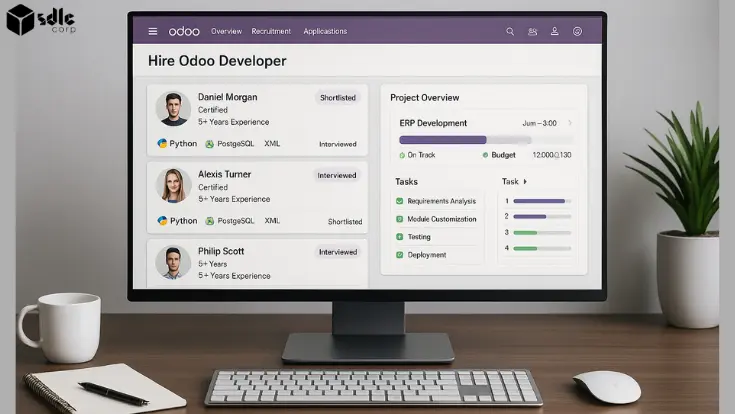
Odoo’s ERP system offers a wide range of functional modules like CRM, Accounting, Sales, Inventory, HR, and more that empower businesses to manage all operations within a unified platform. These modules are built to be user-friendly and customizable for different industries and workflows.
By partnering with an Odoo Module Development Company, organizations can tailor the ERP system to their specific needs, from developing unique business logic to integrating third-party services. In this comprehensive guide, we will walk through what Odoo modules are, how to locate and activate them, and how to install both default and custom modules through UI, CLI, or manual methods. We’ll also include a practical step-by-step walkthrough with expert-level insights

What Are Odoo Modules?

Odoo modules are self-contained components that add new features or modify existing behavior within the system. These modules can:
Add new business functions (e.g., eCommerce, POS, Payroll)
Customize workflows (e.g., Sales cycle, HR approvals)
Modify UI and reports (e.g., custom invoice layouts)
Integrate external APIs (e.g., payment gateways, logistics)
There are three types of modules:
- Official Odoo Modules: Built by Odoo and available in the Apps Store
- Third-party Modules: Community-built modules often found on GitHub or Odoo App Store
- Custom Modules: Tailored modules developed by Odoo partners or internal teams
Pre-requisites Before Installing Modules

Before proceeding with any installation, ensure you have:
A working Odoo installation (Community or Enterprise edition)
Administrator access to your Odoo dashboard
Knowledge of your Odoo version (important for compatibility)
SSH or file system access (for manual/CLI methods)
- Backup of your current database
Tip: Always set up a staging environment before installing new modules in production.
Navigating to Modules and Categories in Odoo
To begin installing or activating modules, follow these steps:
A. Navigate to Apps

Go to your Odoo Dashboard
Click on the Apps or Modules section
B. Explore Module Categories

Click Categories on the top menu
Select All to view available module types (e.g., Sales, HR, Accounting, Marketing, etc.)
Activating Modules from the UI (Recommended for Beginners)
Example: Activating the CRM Module

Go to Apps
Use the search bar and type CRM
Click on Install or Activate
After successful installation, the module will appear in your main dashboard.
Viewing Installed Modules

Navigate to Apps > Installed
Here, you’ll see a list of all active modules currently running in your Odoo environment
Manual Installation of Custom Modules (Advanced)

If you’re installing a third-party or custom-built module:
Step-by-Step Process:
- Step 1: Download the module as a
.zipor clone the GitHub repo Step 2: Extract and place the folder in your custom addons path (e.g.
/opt/odoo/custom_addons/module_name)Step 3: Update the
odoo.conffile:addons_path = /opt/odoo/odoo/addons,/opt/odoo/custom_addonsStep 4: Set permissions:
sudo chown -R odoo:odoo /opt/odoo/custom_addons/module_nameStep 5: Restart the Odoo service:
sudo systemctl restart odooStep 6: Log in to Odoo, go to Apps, click Update Apps List, then install the module
This is the preferred method for installing non-marketplace modules or internal tools.
Using the CLI for Module Installation

For developers and advanced users, the command line (CLI) is efficient for batch module installation or integration with deployment pipelines.
CLI Installation Command:
./odoo-bin -c /etc/odoo/odoo.conf -d your_database -i module_name --stop-after-init
CLI Upgrade Command:
./odoo-bin -c /etc/odoo/odoo.conf -d your_database -u module_name --stop-after-init
Version-Specific Tips

Odoo 8-11: Older UI; modules may appear under “Local Modules”
Odoo 12-16: Stronger community support, modern UI, better module syncing
Odoo 17-18: Predictive module install suggestions, vertical menu layout, performance boosts
Always verify module compatibility with your Odoo version before installation.
Troubleshooting Installation Issues
| Problem | Cause | Solution |
|---|---|---|
| Module not visible | Filter enabled | Uncheck “Apps” filter, enable Dev Mode |
| Access denied | File permissions issue | Use chown to set correct access |
| Database error | Incorrect DB config | Check DB name and credentials |
| Missing dependency | Python module not installed | Use pip install to resolve dependencies |
Best Practices for Odoo Module Deployment
Always work in a staging environment
Use virtual environments for clean Python dependencies
Maintain a Git repo for custom modules
Create automated backup scripts
Follow Odoo security guidelines during development
Testing Modules After Installation
After installing a module, it’s essential to verify that it functions as expected. Here’s how you can test a newly installed module in Odoo:
Key Steps:
Check the Menu Items: Confirm that the new module has added relevant menus to your dashboard or top navigation.
Test the Views: Open the module interface and interact with forms, kanban views, reports, and dashboards.
Create a Sample Record: Add a dummy entry (e.g., a test CRM lead or invoice) to ensure workflows are executing correctly.
Monitor Logs: Check your Odoo server logs for any errors during interaction with the module.
Review Integration Points: If the module integrates with others (e.g., Sales + Inventory), test the cross-functional flows.
Pro Tip: Perform testing in a staging environment before enabling the module on your production database.
Using Developer Mode in Odoo
Developer Mode is a powerful tool for anyone customizing, debugging, or managing modules in Odoo. It unlocks access to advanced settings, technical features, and system insights.
Why Enable Developer Mode?
View technical names of fields, models, menus
Access debug info on views and actions
Modify form views and automate workflows
Install/uninstall hidden or technical modules
How to Enable Developer Mode:
Go to your Odoo dashboard
Click your profile icon (top-right corner)
Select “About”
Click “Activate Developer Mode”
Alternatively, append ?debug=1 to your URL (e.g., https://yourdomain.com/web?debug=1).
Managing Security and Access Rights
Once a module is installed, controlling who can access what is crucial for system security and compliance.
How to Manage Access:
Go to Settings → Users & Companies → Users
Select the user to configure
Scroll to the Access Rights tab
Assign roles based on the installed module (e.g., Sales Manager, HR Officer)
Additional Tools:
Record Rules: Define conditions under which users can see or edit specific records.
Groups: Use user groups to apply permissions to multiple users at once.
Field-Level Access (Advanced): Customize visibility/edit rights for individual fields in Developer Mode.
Reminder: Always test permissions with a non-admin test account to ensure proper access control.
Working with an Odoo Development Company
Partnering with an experienced Odoo Module Development Company can offer:
Custom module creation tailored to your workflow
Performance tuning and compatibility testing
UI/UX customization to match your brand
Integration with third-party tools like Shopify, QuickBooks, or Google Workspace
For retail businesses, an Odoo POS Development Company can help customize the point-of-sale module for smoother checkout, barcode integration, and inventory syncing.
If your project involves complex workflows, hiring certified Odoo developers ensures best practices and long-term success.

Conclusion
Odoo’s modular architecture empowers businesses to begin with just the essentials and expand their ERP system over time. Whether you start by installing the CRM module in Odoo, deploy custom modules manually, or automate with CLI-based Odoo module installation, having a full understanding of the module lifecycle is key to maximizing your ERP investment.
For companies with unique processes or industry-specific needs, working with a professional Odoo Development Company can help you build custom workflows, integrate third-party tools, and maintain long-term scalability. From Odoo POS customization to advanced accounting logic and UI personalization, tailored solutions ensure your ERP system grows with your business.
Looking to get started with tailored Odoo implementations? Contact our Odoo experts today and unlock the full potential of Odoo for your organization.
FAQ's
Can I install multiple Odoo modules at once?
Yes. When using the CLI method, you can separate module names with commas like so:
-i module_1,module_2,module_3
How do I uninstall a module in Odoo?
Go to Apps > Installed, search for the module, and click Uninstall. For CLI:
-u base –without-demo=all –uninstall
Are Odoo Community modules compatible with Odoo Enterprise?
Many community modules are compatible, but not all. Always check version requirements and test in staging.
What happens if a module breaks my Odoo system?
Disable the module via command line or remove it manually from the addons directory, then restart the server. Restoring from backup is also recommended.
How can I check if a custom module has dependencies?
Open the module’s __manifest__.py file. Look for the depends section to identify required modules.
Where can I find safe third-party modules?
Use Odoo Apps Store or trusted GitHub repositories. Verify developer reputation before use.
How do I know if a module installed successfully?
If installed via UI, a success message appears. For CLI, check terminal output or Odoo logs for confirmation.