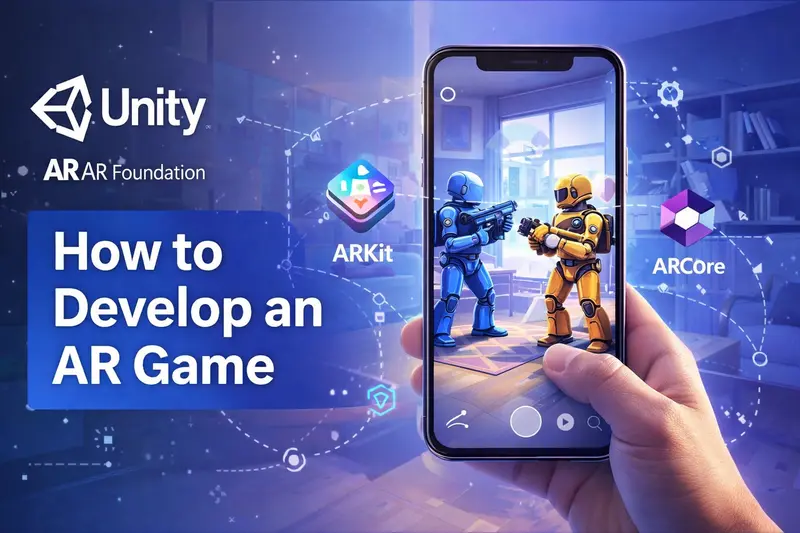
The short version: Define the game concept → choose your AR SDK and engine → prototype the core AR mechanic → build full game → test on real devices across lighting conditions → submit to app stores. The stages are the same as any mobile game, but the AR tracking and testing stages take significantly longer and require specialist skills.
This guide covers how to develop an AR game from concept to App Store launch — what to decide at each stage, where projects typically go wrong, and what to confirm before committing budget to full production.
For SDK selection, the ARKit vs ARCore comparison covers the full breakdown. For budgeting, the AR game development cost guide has ranges by project type.
What You Need Before You Start
Before writing any game code, you need the right tools installed and a real test device in hand. AR development done entirely in a simulator will fail when you put the phone in a real room.
| What you need | Details | Why |
|---|---|---|
| Unity (LTS release) | Unity 2022 LTS or 2023 LTS recommended | LTS releases have stable ARFoundation support. Avoid non-LTS for production builds |
| AR Foundation package | Install via Unity Package Manager | The cross-platform AR layer — sits on top of ARKit and ARCore so your code works on both iOS and Android |
| ARKit XR Plugin | Install via Package Manager — iOS only | Required for AR on iPhone and iPad. Gives AR Foundation access to ARKit's tracking features |
| ARCore XR Plugin | Install via Package Manager — Android only | Required for AR on Android. Gives AR Foundation access to ARCore's surface detection and tracking |
| Physical test device | One iPhone (iOS 16+) and one Android phone (Android 8+, ARCore supported) | You cannot test AR in a simulator. Surface detection, tracking stability, and performance all behave differently on a real device |
| Apple Developer account | $99/year — required for iOS device builds | You need a provisioning profile to deploy a debug build to a physical iPhone |
| Backend decision | Firebase, PlayFab, or custom — decide before you start | If your game has leaderboards, multiplayer, or user accounts, set up the backend before writing game logic. Retrofitting it later requires rebuilding core systems |
ARCore supports most Android phones running Android 8.0 or higher, but not all. Check the official ARCore supported devices list before committing to an Android-first build — some budget phones do not support ARCore at all.
Unity Setup for AR Game Development
Here is the exact setup sequence to get a working AR scene in Unity from scratch. This takes about 20–30 minutes on a clean install.
- 1 Install Unity Hub and Unity 2022 LTS — download from unity.com. Choose the 2022 LTS release. During install, add the iOS Build Support and Android Build Support modules if you plan to deploy to both platforms.
- 2 Create a new 3D (URP) project — in Unity Hub, create a new project using the Universal Render Pipeline template. URP gives better performance on mobile than the default Built-In pipeline.
- 3 Install AR Foundation — open
Window → Package Manager → Unity Registryand install AR Foundation. This is the cross-platform layer that lets the same code run on both ARKit and ARCore. - 4 Install the platform plugins — still in Package Manager, install Apple ARKit XR Plugin (for iOS) and Google ARCore XR Plugin (for Android). Enable each one in
Edit → Project Settings → XR Plug-in Managementunder the iOS and Android tabs. - 5 Set up the AR scene — create an empty scene. Add an AR Session GameObject and an AR Session Origin (or XR Origin in newer AR Foundation versions). The AR Camera inside XR Origin replaces the default Unity camera. This is the minimum scene structure needed for any AR build.
- 6 Add plane detection — add an AR Plane Manager component to the XR Origin. Assign a plane prefab so detected surfaces are visible. On your first test build, you should see coloured planes appear on real floors and tables when you point the phone camera at them.
- 7 Place an object on a detected plane — add an AR Raycast Manager to XR Origin. Cast a ray from the screen centre to the nearest detected plane on tap. Instantiate a prefab at the hit position. This is the foundation of almost every AR game interaction: detect surface → raycast → place object.
- 8 Deploy to a physical device — for iOS, connect your iPhone, select it as the build target in
File → Build Settings, and build. You need an Apple Developer account and a valid provisioning profile. For Android, enable Developer Mode on the phone, connect via USB, and build directly. The first device build always takes longer than expected — allow an hour for the first iOS build.
Once a virtual object stays on a real surface as you walk around the phone, your AR Foundation setup is working correctly. Everything from here — game logic, art, multiplayer — is built on top of this foundation.
The 8 Stages of AR Game Development
The complete augmented reality game development process, with typical durations at each stage:
| # | Stage | What happens | Typical duration |
|---|---|---|---|
| 1 | Concept and scope | Define the game type, AR mechanic, platform, audience | 1–2 weeks |
| 2 | Tech stack decisions | Choose SDK, game engine, backend approach | 1 week |
| 3 | Prototype | Build the core AR mechanic on a real device | 3–6 weeks |
| 4 | Game design document | Lock mechanics, levels, progression, UI before full build | 1–2 weeks |
| 5 | Art production | 3D models, characters, environments, animations, UI | 6–16 weeks (runs in parallel) |
| 6 | Full development | Game logic, AR integration, backend, multiplayer | 8–20 weeks |
| 7 | QA and device testing | Testing across devices, lighting, performance profiling | 3–6 weeks |
| 8 | Launch and live ops | App store submission, server setup, post-launch updates | Ongoing |
AR Game Development Steps: Each Stage Explained
Concept and Scope
Before any technical decisions, you need to define four things clearly:
- Game type — marker-based (AR triggered by an image), location-based (GPS), surface-based (objects placed on floors and tables), or face-based (using the front camera)
- Platform — iOS only, Android only, or both
- Single or multiplayer — multiplayer AR adds significant complexity and cost
- Target device range — are you building for the latest iPhones only, or do you need mid-range Android support too
These four decisions shape every technical choice that follows. Getting them wrong early — building a surface-based AR game when your audience's devices do not support reliable plane detection, for example — causes expensive rework mid-production.
Tech Stack Decisions
Three decisions to make before writing any code:
- AR SDK — ARKit (iOS), ARCore (Android), or Unity ARFoundation (both). For most games targeting both platforms, ARFoundation is the right choice — the ARKit vs ARCore comparison covers every difference.
- Game engine — Unity is the most common choice for mobile AR games. It has the deepest ARFoundation integration, the largest community, and the most AR-specific assets and plugins. Unreal Engine works for visually intensive games but has a steeper AR learning curve.
- Backend — if your game has leaderboards, multiplayer, user accounts, or persistent data, you need a backend from day one. Retrofit it later and you rebuild half the game.
Prototype the Core AR Mechanic
This is the most important stage and the one most skipped. Build a basic version of just the AR interaction — not the full game — on a real device before committing to full production.
A prototype answers the question: does the core mechanic actually work in the real world? AR games behave very differently in a simulator versus on a physical device in a real room. Problems that are invisible on screen become obvious immediately when you put the phone in your hand:
- Surface detection that works fine in a brightly lit office fails in a living room at night
- Virtual objects that look correctly placed on screen appear to float or sink on the actual floor
- Tracking that is stable on a new iPhone drifts noticeably on a mid-range Android
A prototype costs $5,000–$20,000 and takes 3–6 weeks. It is much cheaper to discover that your AR interaction does not work the way you imagined before you have paid for 3D art and months of game logic.
Game Design Document
Once the prototype confirms the AR mechanic works, write down the full game before building it. A game design document (GDD) covers:
- Core gameplay loop — what does the player do every 30 seconds
- Levels, progression, and difficulty curve
- AR interactions — exactly how virtual objects respond to the real world
- UI layout and player feedback systems
- Monetisation if applicable — in-app purchases, ads, premium
- Technical requirements — performance targets, minimum supported devices
The GDD is the document everything else is built from. Engineers build what it says. Artists produce what it describes. Changes after the GDD is signed off cost more at every step.
Art Production
AR games have specific art requirements that differ from regular mobile games. Assets need to be optimised for real-time rendering on a phone while the camera feed is also running in the background — which means tighter polygon budgets and more aggressive texture compression than a comparable non-AR mobile game.
Key art deliverables for an AR game:
- 3D models — characters, objects, environments. Each must be optimised for mobile rendering
- Animations — movement, idle states, reaction animations when players interact
- Shaders — AR-specific shaders that handle occlusion (making virtual objects go behind real ones), shadow casting onto real surfaces, and environment light matching
- UI — all heads-up display elements, menus, and feedback indicators
- VFX — particle effects, hit effects, environmental effects
Art production typically runs in parallel with development once the GDD is locked. The art pipeline is usually the longest single phase for mid-to-large AR games.
Full Development
This is the main build phase. On top of normal game code, AR adds six specific engineering problems your team needs to solve:
- Surface detection — Unity's ARPlaneManager detects floors, walls, and tables. You anchor virtual objects to detected planes so they stay put as the player walks around
- Occlusion — virtual objects should go behind real objects, not float in front of them. On iPhone Pros with LiDAR, ARKit handles this natively. On other devices you use software depth estimation, which is less reliable
- Light matching — ARKit and ARCore both estimate real-world lighting and let you apply it to virtual objects so they look like they belong in the scene
- Spatial audio — Unity's audio system can make sounds appear to come from the position of a virtual object in real space
- Multiplayer (if needed) — getting two phones to show the same AR object at the same real-world spot requires ARCore Cloud Anchors and a real-time server. This is the hardest part of any AR build
- Performance — the camera feed, AR tracking, and game rendering all run at the same time. Mid-range Android phones struggle with all three. Set low polygon budgets for 3D art early and profile on cheap Android devices from the start
QA and Device Testing
AR games need more testing than regular mobile games because the real world is unpredictable. Your test plan should cover:
- Lighting — test in bright sunlight, a dim living room, and a room lit only by a single lamp. Plane detection behaves very differently across these three conditions
- Surfaces — white walls and plain floors are hard for the tracking system to read. Test on them early so you can add fallback behaviour
- Devices — test on at least two iPhones (one Pro with LiDAR, one without) and three Android phones at different price points
- Movement — cover the camera briefly, move the phone fast, tilt it at steep angles. These are the conditions where tracking breaks most often
- Battery and heat — after 10 minutes of AR play on a warm day, some phones slow down by 30–40%. Test for it before launch
Do not leave device testing until the end. Start putting builds on real phones at the prototype stage. An AR tracking bug found a week before launch usually means changing the core architecture — not a quick patch.
Launch and Live Ops
AR games have ongoing post-launch requirements that are heavier than standard mobile games:
- SDK updates — Apple and Google update ARKit and ARCore regularly. New iOS or Android releases sometimes break AR behaviour that worked previously. Each major OS update requires a compatibility check and often a patch release
- New device support — new phone hardware introduces new capabilities (like LiDAR on newer iPhones) and sometimes new compatibility problems
- Content updates — for games with live service models, new seasonal content, events, and features keep the player base active
- Server maintenance — any game with a backend, leaderboards, or multiplayer needs ongoing infrastructure monitoring
Set aside 15–20% of your initial build budget annually for maintenance and updates. An AR game that receives no updates after launch typically loses most of its active players within 6 months as OS updates break AR features.
Where AR Game Development Gets Hard
Six problems that slow down almost every AR project — and what to do about each one:
| Problem | Why it happens | How to handle it |
|---|---|---|
| Tracking drift | Virtual objects slowly shift position as the player moves around. Happens when the tracking algorithm loses confidence in its position estimate. | Place objects using ARFoundation anchors, not raw world positions. Test in your target room early. Show the player a message when tracking is weak. |
| Plain white floors and glass | The tracking system needs surface texture to lock onto. White floors and glass give it almost nothing to work with. | Test on white floors from the prototype stage. Add a distance-based placement fallback for when the camera cannot detect a surface. |
| Slow phones running out of power | The camera feed, AR tracking, and game graphics all run at once. Cheap Android phones cannot keep up and will drop below 30fps or overheat. | Set low 3D art budgets early. Test on a $150 Android phone from the start. Add a graphics quality setting players can turn down. |
| Multiplayer objects jumping | Two players need to see the same AR object at the same real spot. Even small network delays make objects visibly jump position. | Use ARCore Cloud Anchors as the shared reference. Smooth position updates between frames rather than snapping. Plan for this from the very start — not after the game is built. |
| Battery draining quickly | Camera plus AR tracking plus game graphics drains most phones in 30–40 minutes. | Slow down the tracking update rate when the player is not moving. Warn players before long sessions. This is expected behaviour for AR — design around it. |
| iOS or Android update breaks the game | Apple and Google update ARKit and ARCore every year. Tracking behaviour that worked reliably can change with a new OS version. | Check ARKit and ARCore release notes after every major iOS and Android update. Budget for an annual compatibility check even if no new features are added. |
Build It Yourself vs Hire a Studio
Whether you plan to create an AR game in-house or with a studio, the decision comes down to your team's existing skills and how much risk you can absorb.
Build it yourself if:
- Your team already has Unity and ARFoundation experience
- The game is simple — marker-based or basic surface placement
- You have time to learn through iteration
- The project is internal or experimental with no hard deadline
Hire an AR game development company if:
- Your team does not have AR-specific engineering experience
- You need multiplayer, location features, or complex tracking
- You have a budget and a deadline
- You need cross-platform (iOS + Android) in one build
- You want a prototype in weeks, not months
The middle option — a hybrid where you hire an AR studio for the AR engineering and prototype, then take over feature development yourself — often works well for teams that have general Unity skills but not AR-specific experience.
6 Mistakes That Slow Down the AR Game Development Process
- 1 Skipping the prototype. The most common and most expensive mistake. Building full art and game logic before testing the AR mechanic on a real device leads to fundamental rework when the tracking does not behave as expected.
- 2 Testing only in the simulator. AR simulators do not reproduce real lighting, surface variation, or device performance. A game that passes all simulator tests can fail immediately on a physical phone in a dimly lit room.
- 3 Leaving multiplayer for later. Adding real-time shared AR after the game is built requires rearchitecting the anchor system, backend, and game state sync. Plan for multiplayer from the beginning if the game needs it.
- 4 No art pipeline for mobile. Using 3D assets from PC or console games without optimising for mobile AR results in poor frame rates, thermal throttling, and battery drain. AR art needs its own polygon budget and texture compression pipeline.
- 5 Not testing on low-end Android devices. An AR game that runs well on a new iPhone may be unplayable on a $200 Android phone. If your target audience uses mid-range Android, test on those devices from week one.
- 6 No post-launch maintenance plan. AR SDKs update with every major iOS and Android release. A game with no maintenance budget will have tracking issues within 12 months of launch as the underlying AR frameworks change.
AR Game Development: Common Questions
How long does it take to develop an AR game?
A simple AR game takes 3–5 months from concept to launch. A mid-range game with moderate complexity takes 5–9 months. A large AR game with multiplayer, location features, and high-fidelity art takes 10–18 months. The prototype phase alone — which should not be skipped — adds 3–6 weeks to any project timeline.
Do I need to know how to code to build an AR game?
For a basic AR experience, tools like Unity with ARFoundation make it possible to get started with limited coding. For a commercial game with gameplay loops, multiplayer, or a backend, you need C# development skills for Unity or C++/Blueprints for Unreal. Most commercial AR games are built by teams of 3–10 people with a mix of engineering, art, and design skills.
What is the best game engine for AR development?
Unity is the most widely used engine for mobile AR games. It has the most complete ARFoundation integration, the largest asset store, the biggest community, and the most documented path to shipping on both iOS and Android. Unreal Engine is a strong choice for visually demanding games but has a steeper AR development curve and less mature cross-platform AR tooling than Unity.
Can I build an AR game without ARKit or ARCore?
Yes — 8thWall is the main alternative for browser-based AR experiences that work without an app download. Vuforia is another option, particularly for marker-based and object-tracking AR. Unity ARFoundation is not a replacement for ARKit and ARCore — it is a layer on top of them. If you want native AR on a phone without using ARKit or ARCore at all, your options are significantly limited.
How many people do I need to build an AR game?
A minimal team for a simple AR game is 3–4 people: one AR engineer, one Unity developer, one 3D artist, and a QA tester. A mid-range game needs 5–7 people — adding a game designer, a backend developer for any server-side features, and dedicated QA. Multiplayer AR games need a team of 7–10 or more.
What is the difference between marker-based and markerless AR?
Marker-based AR triggers when the phone camera recognises a specific image — a card, a logo, a printed pattern. It is simpler to build and more predictable, but requires a physical trigger the player needs to point at. Markerless AR uses surface detection, GPS, or depth sensing to place objects in the world without a specific trigger point. Many commercial AR games use markerless surface detection because it removes the need for a printed trigger or physical object.
Planning an AR Game?
Share your game idea, target devices, and any multiplayer or location requirements. We will identify the right SDK, walk through the likely build stages, and give you a realistic delivery plan and cost range.
Talk to an AR developer →