
Introduction
Tracking expenses is a crucial aspect of managing finances in any organization, and Odoo streamlines this process. With its powerful features, Odoo allows businesses to monitor, categorize, and analyze expenses effectively. Whether you’re a growing business or a large enterprise, implementing expense tracking through Odoo development services ensures efficient financial management, helping you make informed decisions. This flexible tool is customizable, making it suitable for various industries, and the expense module can be tailored to fit specific business needs.
Step-by-Step Process to Track Expenses in Odoo
1. Click on the Expenses Module
Open Odoo and select the Expenses module from the dashboard. This is where you can manage all expense-related activities.
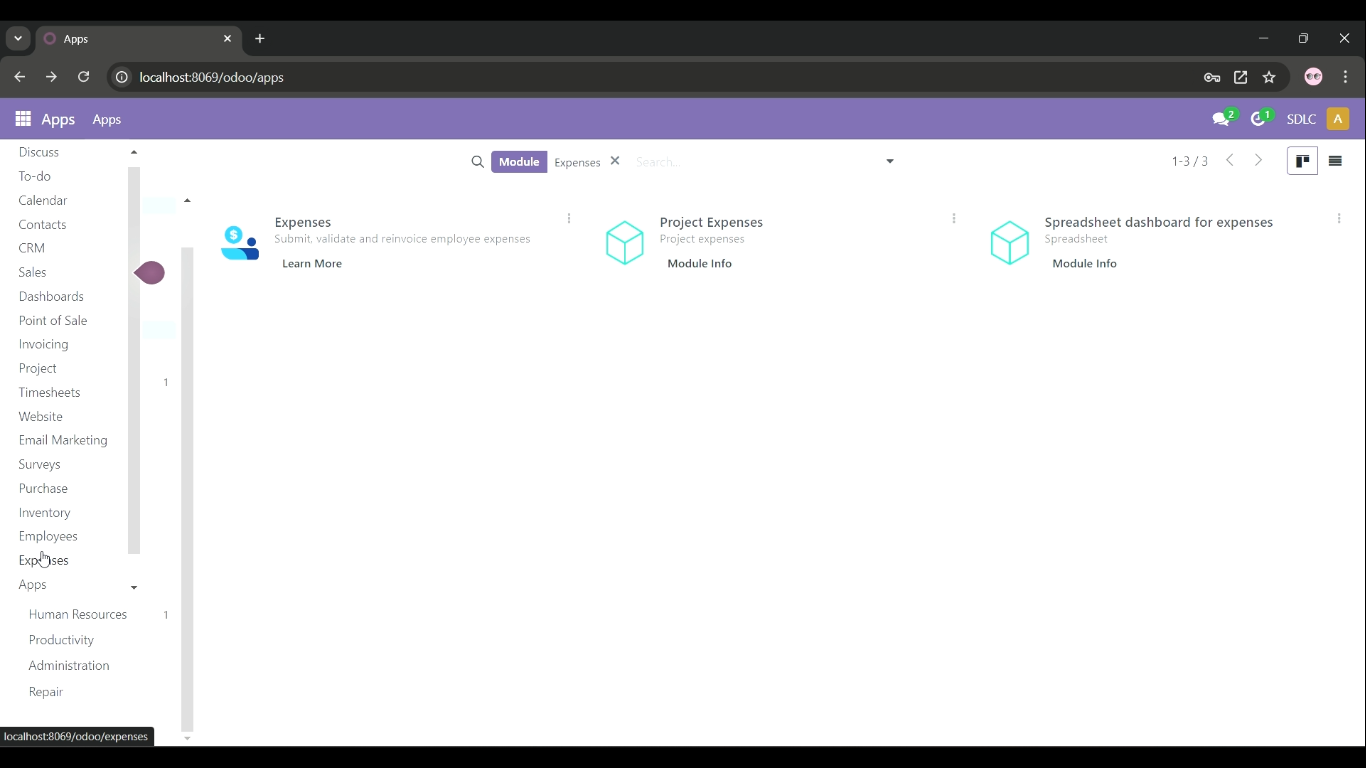
Get a closer look – Here’s the feature at work.
2. Click on the New Expense
To record a new expense, click on the New Expense button. This will open a form where details need to be entered.
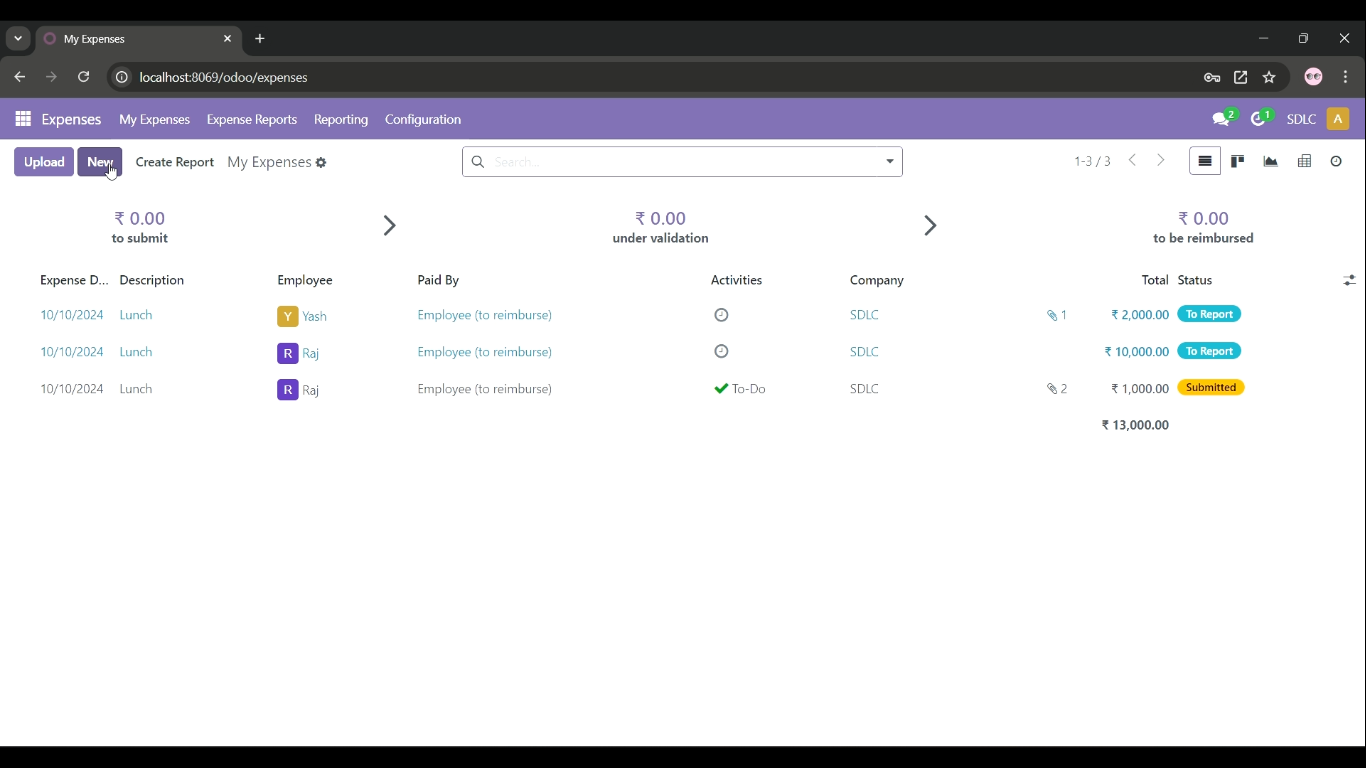
Get a closer look – Here’s the feature at work.
3. Fill in the Expense Details and Attach Receipt
- Provide the necessary details such as the Expense Date, Product/Service Name, Description, and Amount.
- Click on Attach Receipt to upload a scanned or digital receipt for the expense.
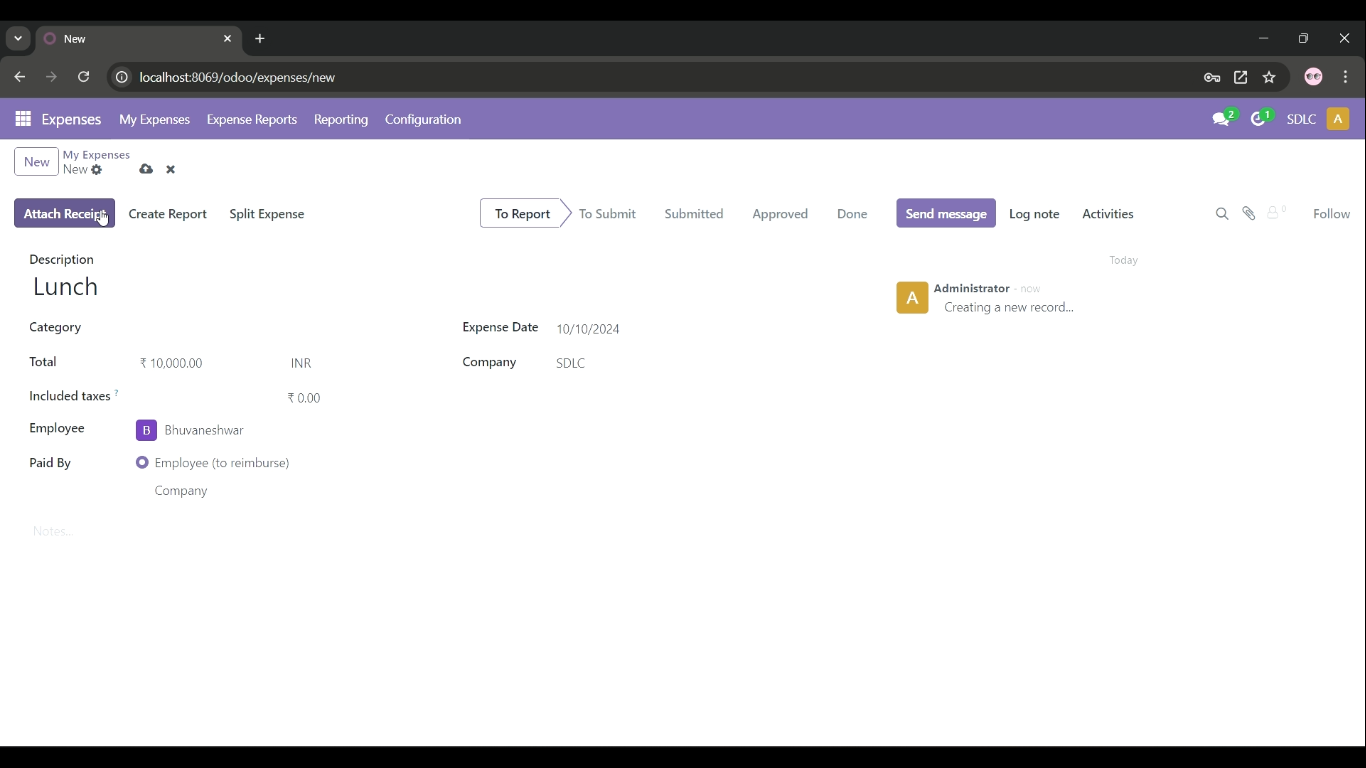
Get a closer look – Here’s the feature at work.
4. Show the Attached Receipt
Once the receipt is attached, it will appear under the expense form as proof of the claim. Ensure that it is clearly visible for review.
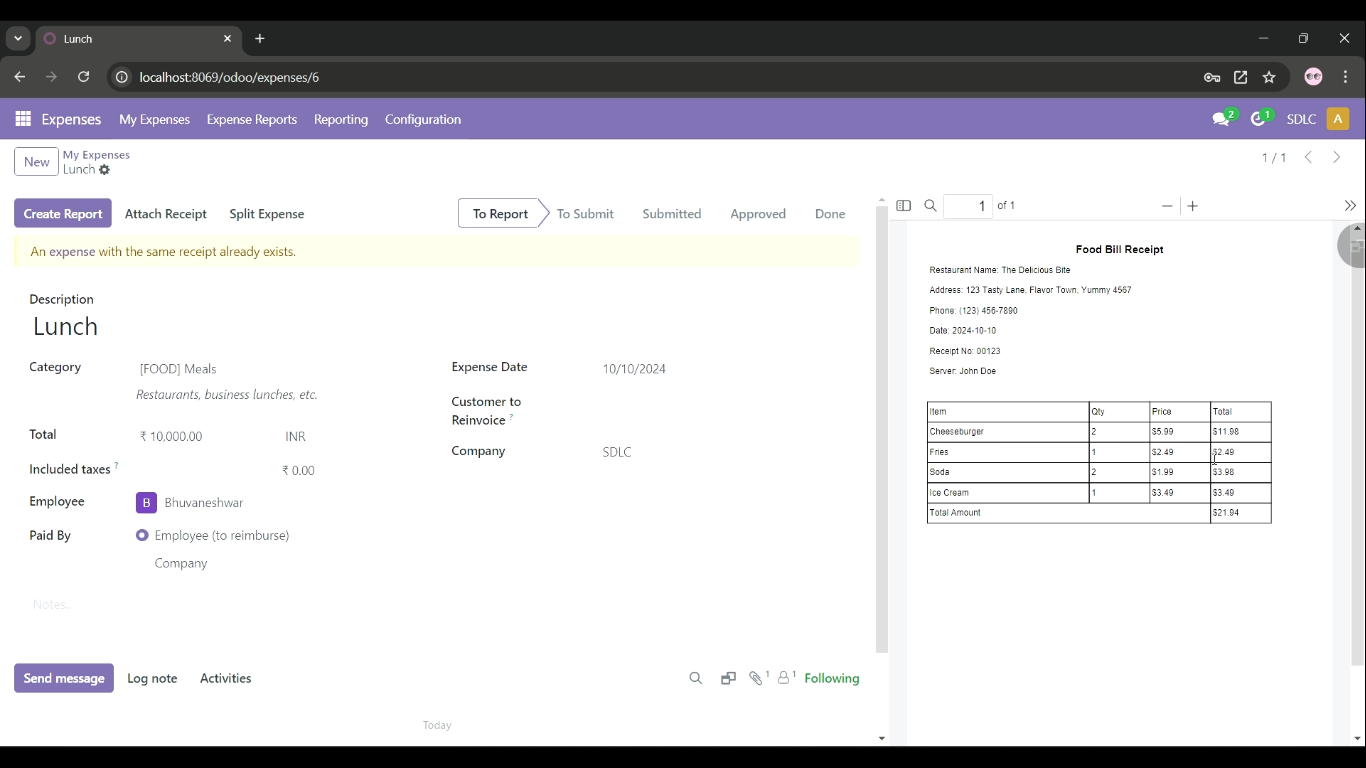
Get a closer look – Here’s the feature at work.
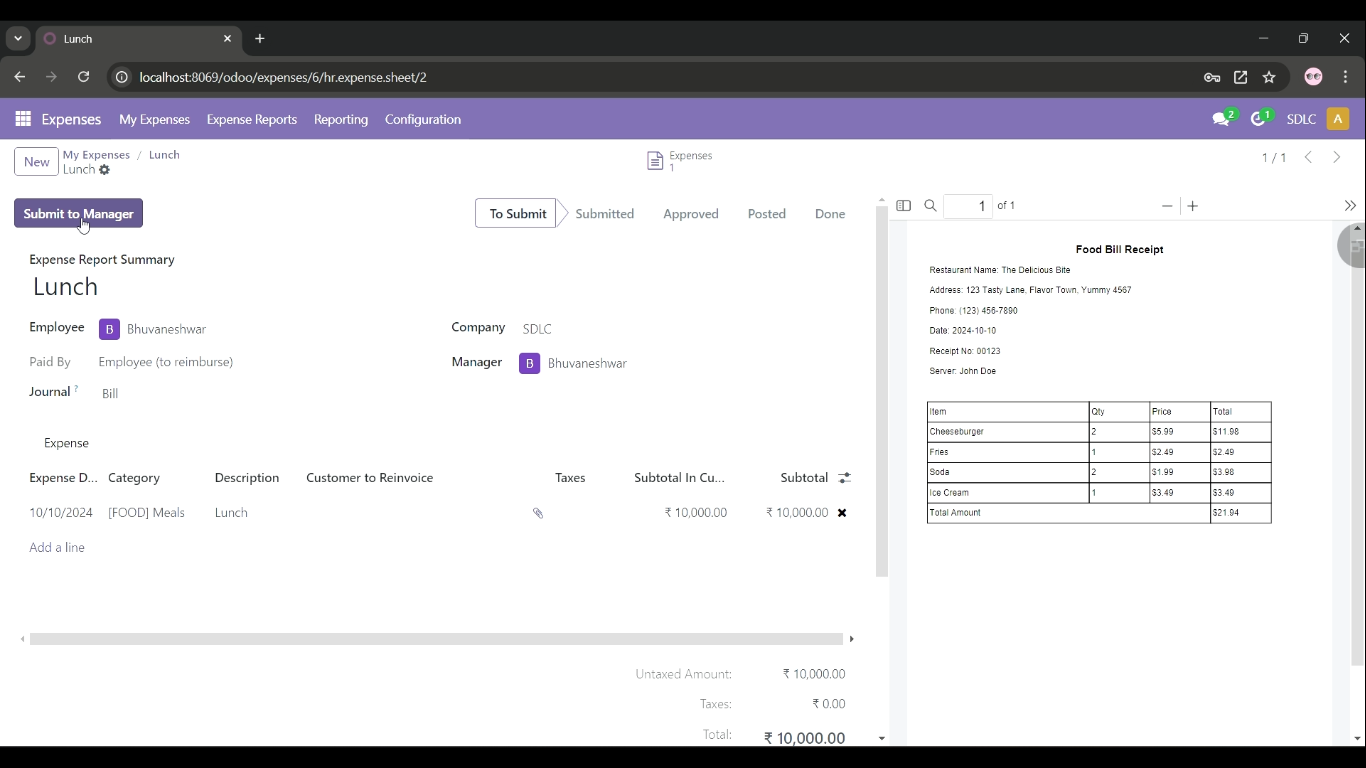
5. Click on Submit to Manager
After filling in all the details, click Submit to Manager to send the expense report for approval. This action will notify the manager for further review.
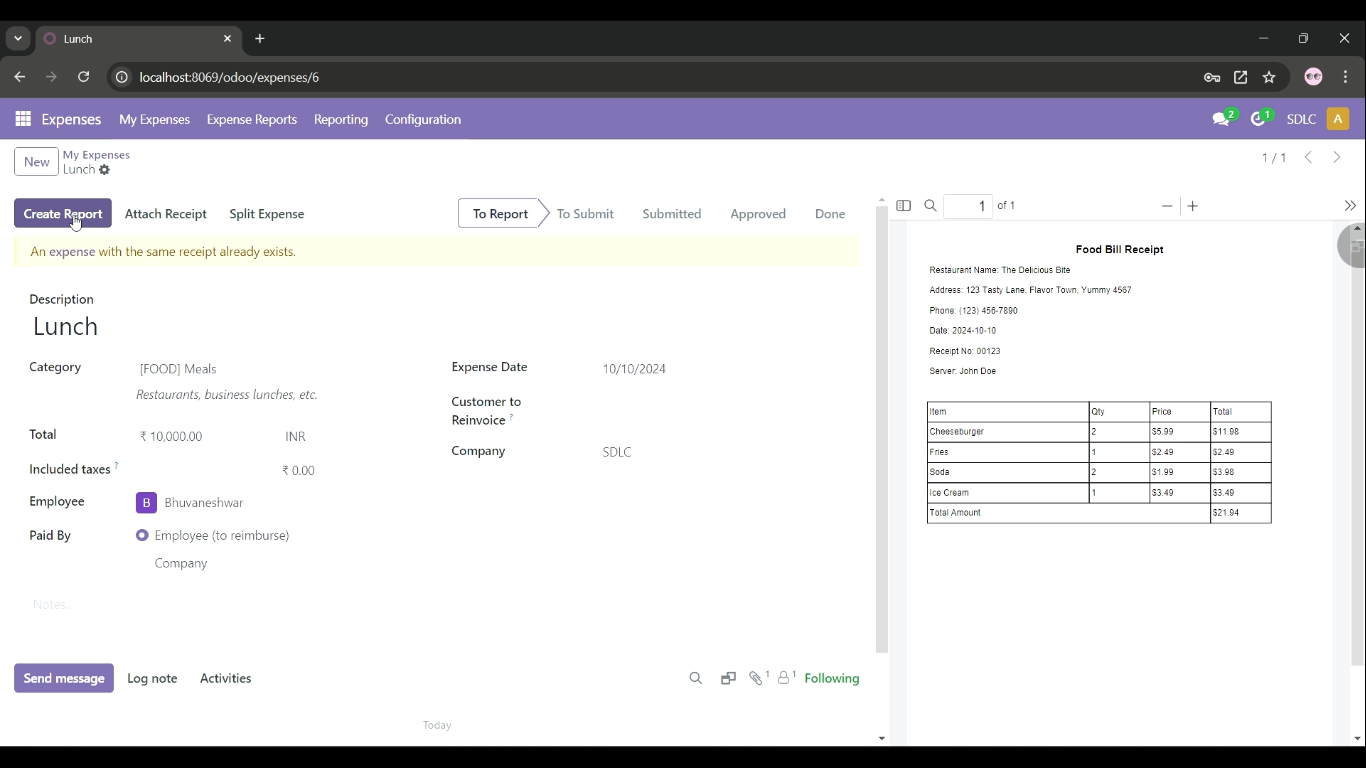
Get a closer look – Here’s the feature at work.
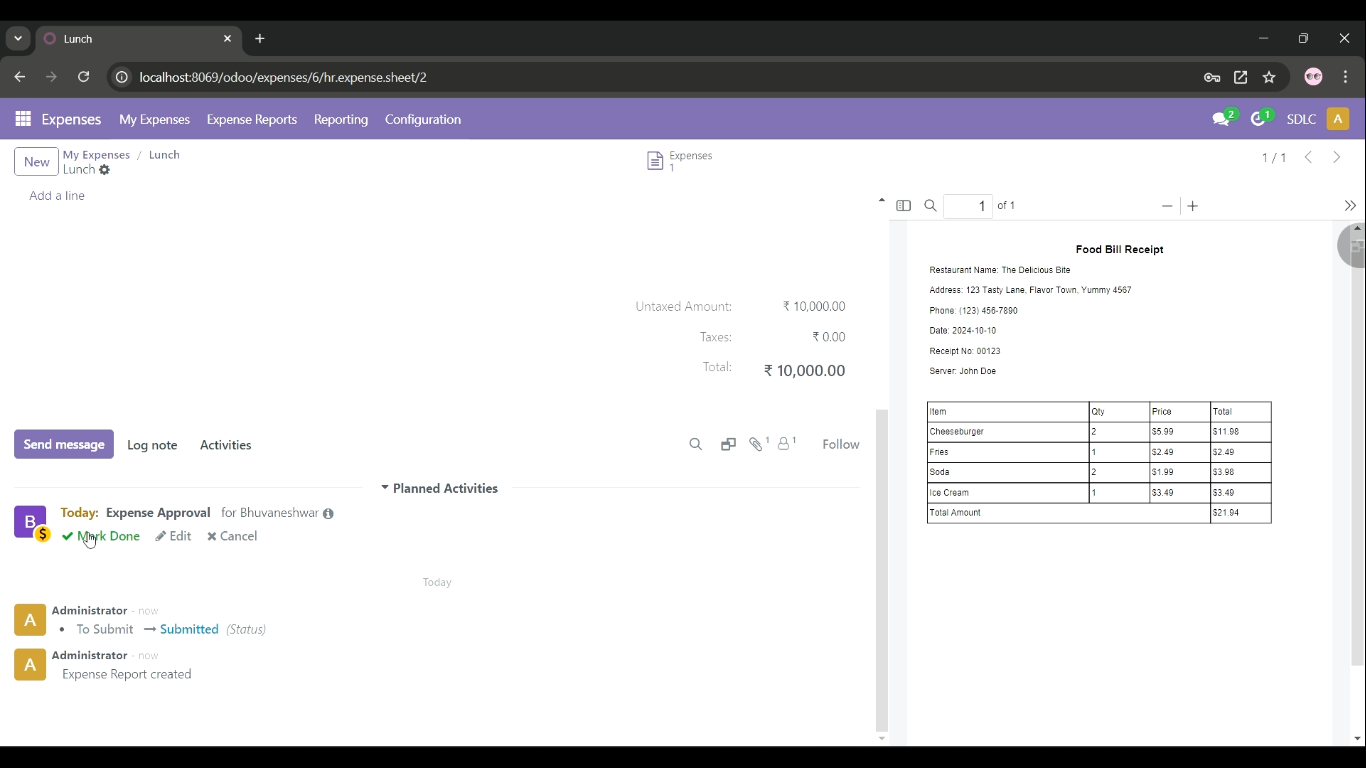
6. Click on Mark as Done
Once the manager approves the expense, mark it as Done to confirm that the expense is finalized.
Get a closer look – Here’s the feature at work.
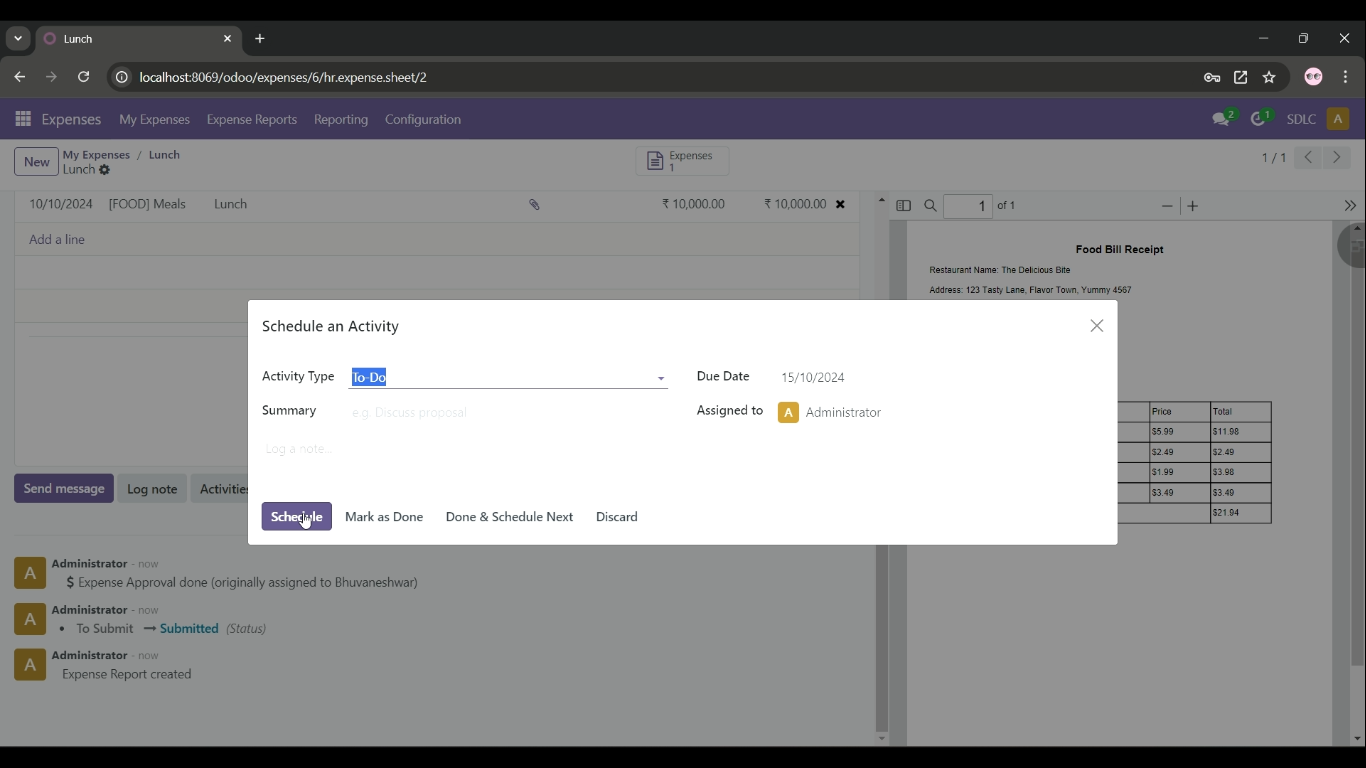
7. Click on Schedule
If required, schedule the payment or reimbursement for a specific date by clicking on Schedule. This helps in planning financial outflows.
Get a closer look – Here’s the feature at work.
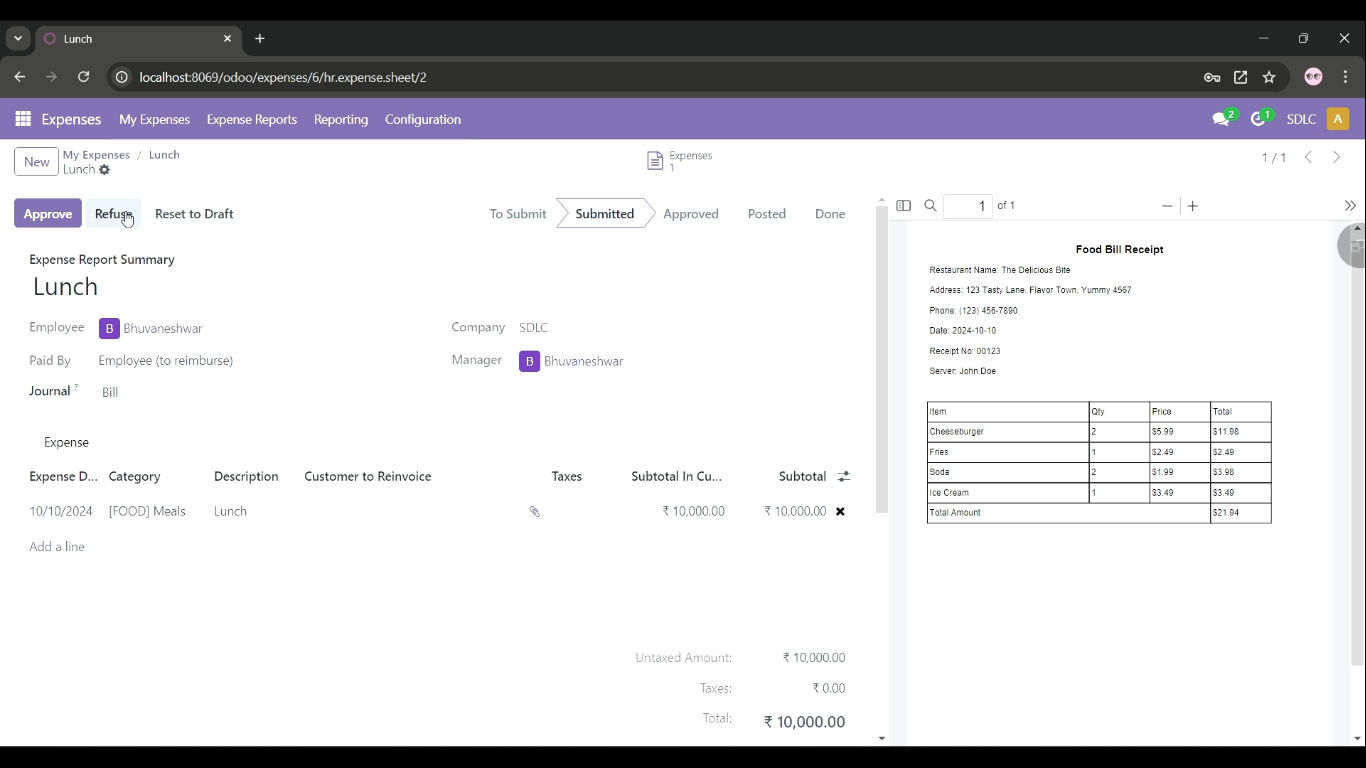
8. Click on Refuse
In case the manager finds the expense invalid or incorrect, they can click on Refuse to reject the submission.
Get a closer look – Here’s the feature at work.
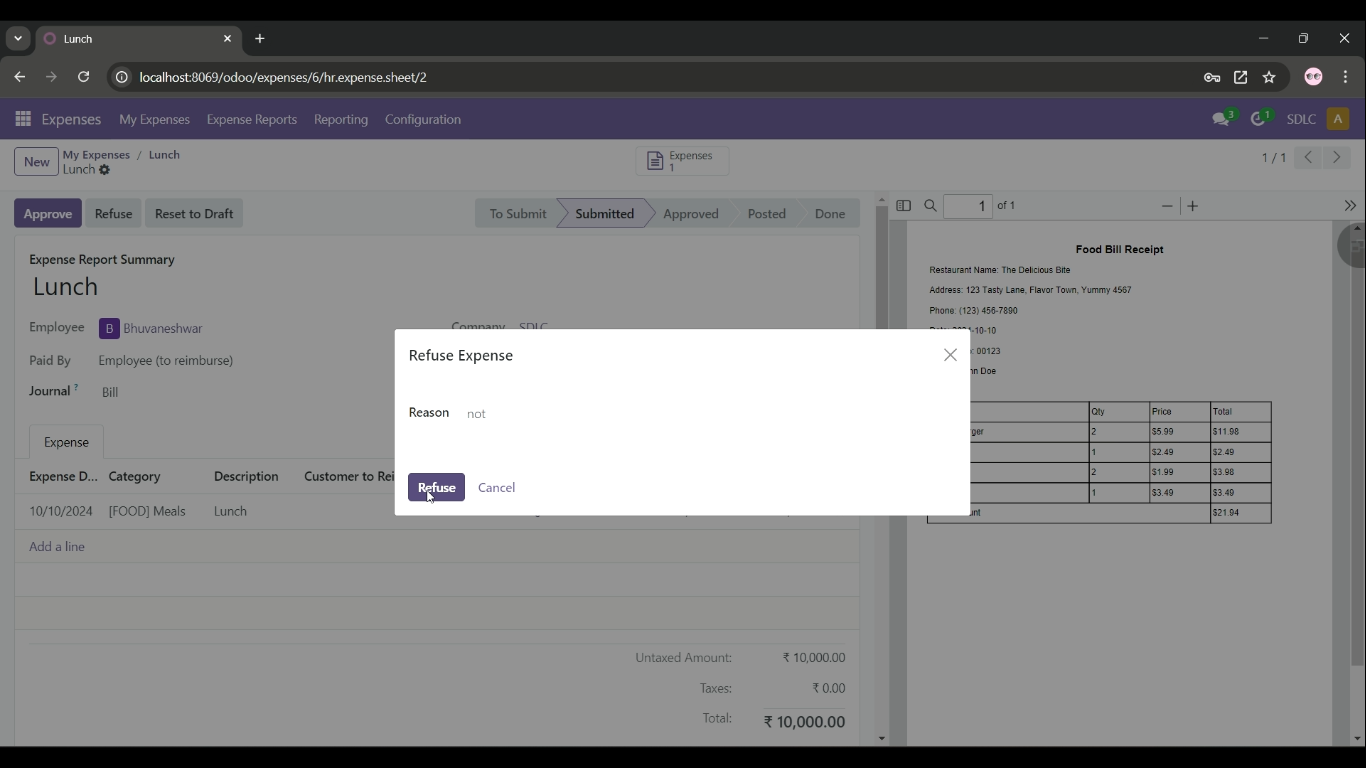
9. Then Click on Refuse Again
Confirm the refusal by clicking Refuse once more. This step ensures that the rejection is intentional and not accidental.
Get a closer look – Here’s the feature at work.
10. Show the Refused Expense
After refusal, the expense report will move to the Refused Expenses section, where it can be reviewed and possibly revised for resubmission.
Get a closer look – Here’s the feature at work.
Expert Odoo ERP Solutions Provider
Hire Expert Odoo Developers for Tailored ERP Solutions Today!
Conclusion
Using Odoo for tracking expenses not only enhances financial control but also improves overall business efficiency. By partnering with an Odoo development agency, businesses can optimize the implementation of expense management tools, ensuring they stay on top of their financial performance. For companies seeking to streamline their financial operations, collaborating with Odoo development firms is a strategic move that delivers long-term benefits.
Need Help Setting This Up in Odoo?
If you want this configured for your team or adapted to the way you work, our Odoo consultants can set it up, train your users and support you after go-live.